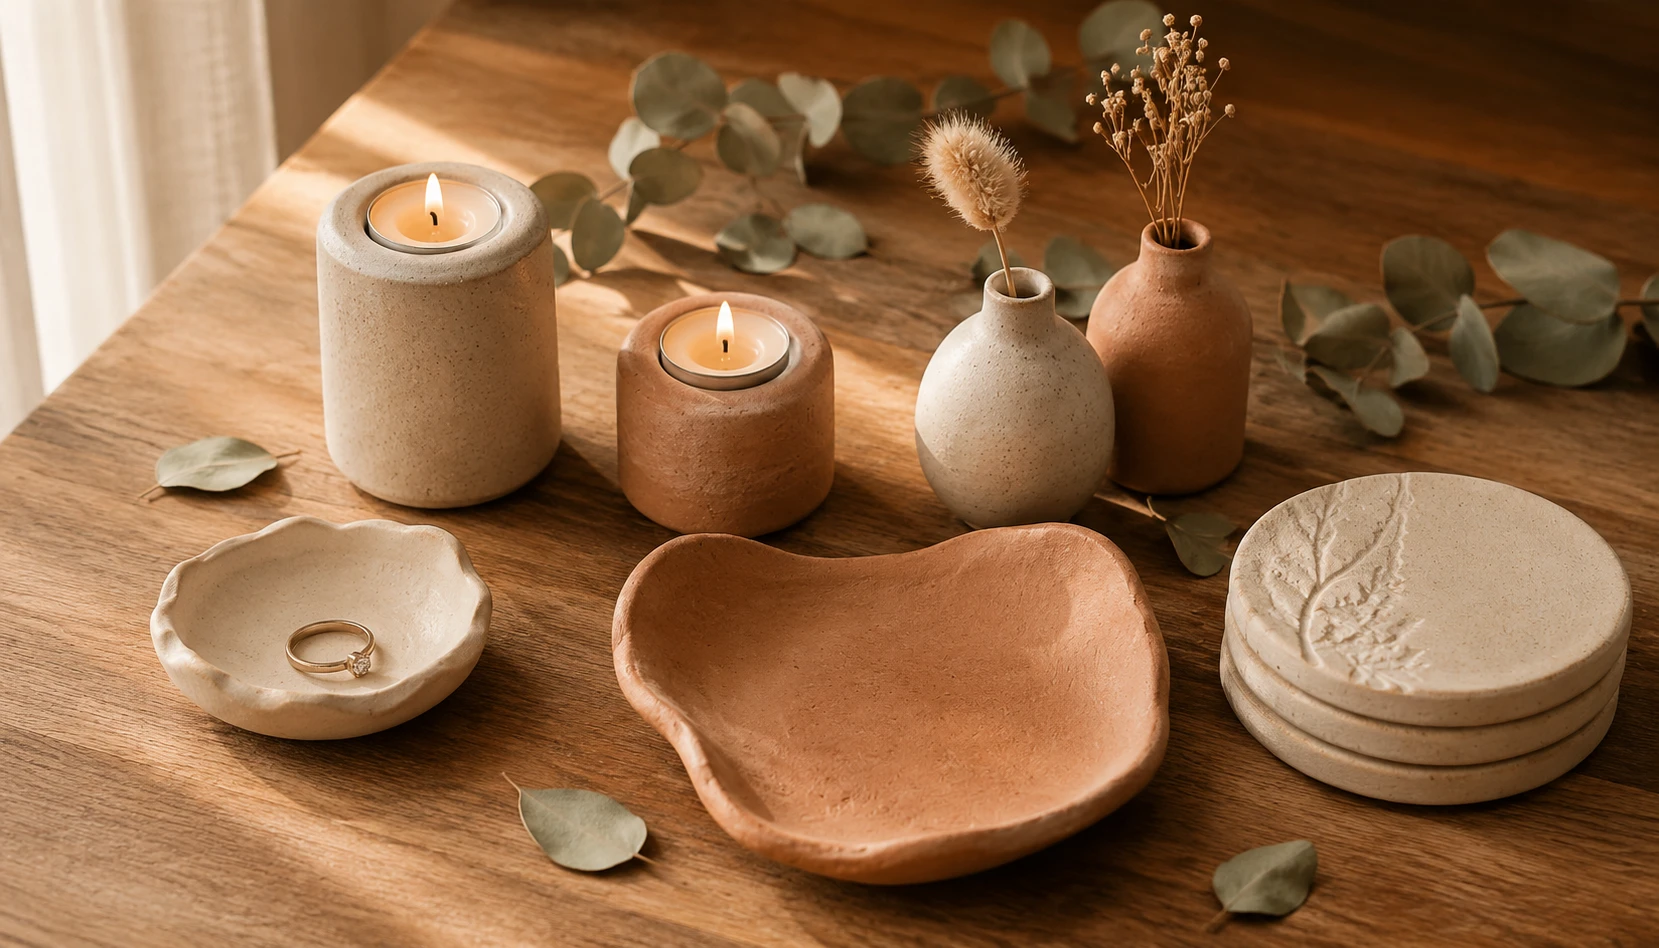
Air dry clay has quietly become one of the most beloved home decor crafts of 2026, and for good reason. Unlike pottery, it needs no kiln, no wheel, and no studio space. Unlike polymer clay, it needs no oven. All it takes is a bag of clay, a bit of water, and an afternoon at your kitchen table to create pieces that look genuinely handmade in the best possible way.
Pinterest named handmade textiles and hand-built clay pieces among the biggest home decor trends of the year, and it makes sense. After years of mass-produced, perfectly uniform decor, people are craving objects that show the hand that made them. A slightly imperfect edge, a visible thumbprint, a one-of-a-kind shape, these small imperfections are exactly what make a piece feel personal rather than generic.
The best part is how forgiving air dry clay is for beginners. A slightly wonky ring dish still looks intentional. An uneven candle holder still glows beautifully. This is a craft where mistakes tend to add character rather than ruin the piece, which makes it the perfect entry point into handmade home decor.
Here are 12 air dry clay projects that require no experience, minimal tools, and produce genuinely beautiful results you will want to display, not hide.
Why Air Dry Clay Is Perfect for Beginners
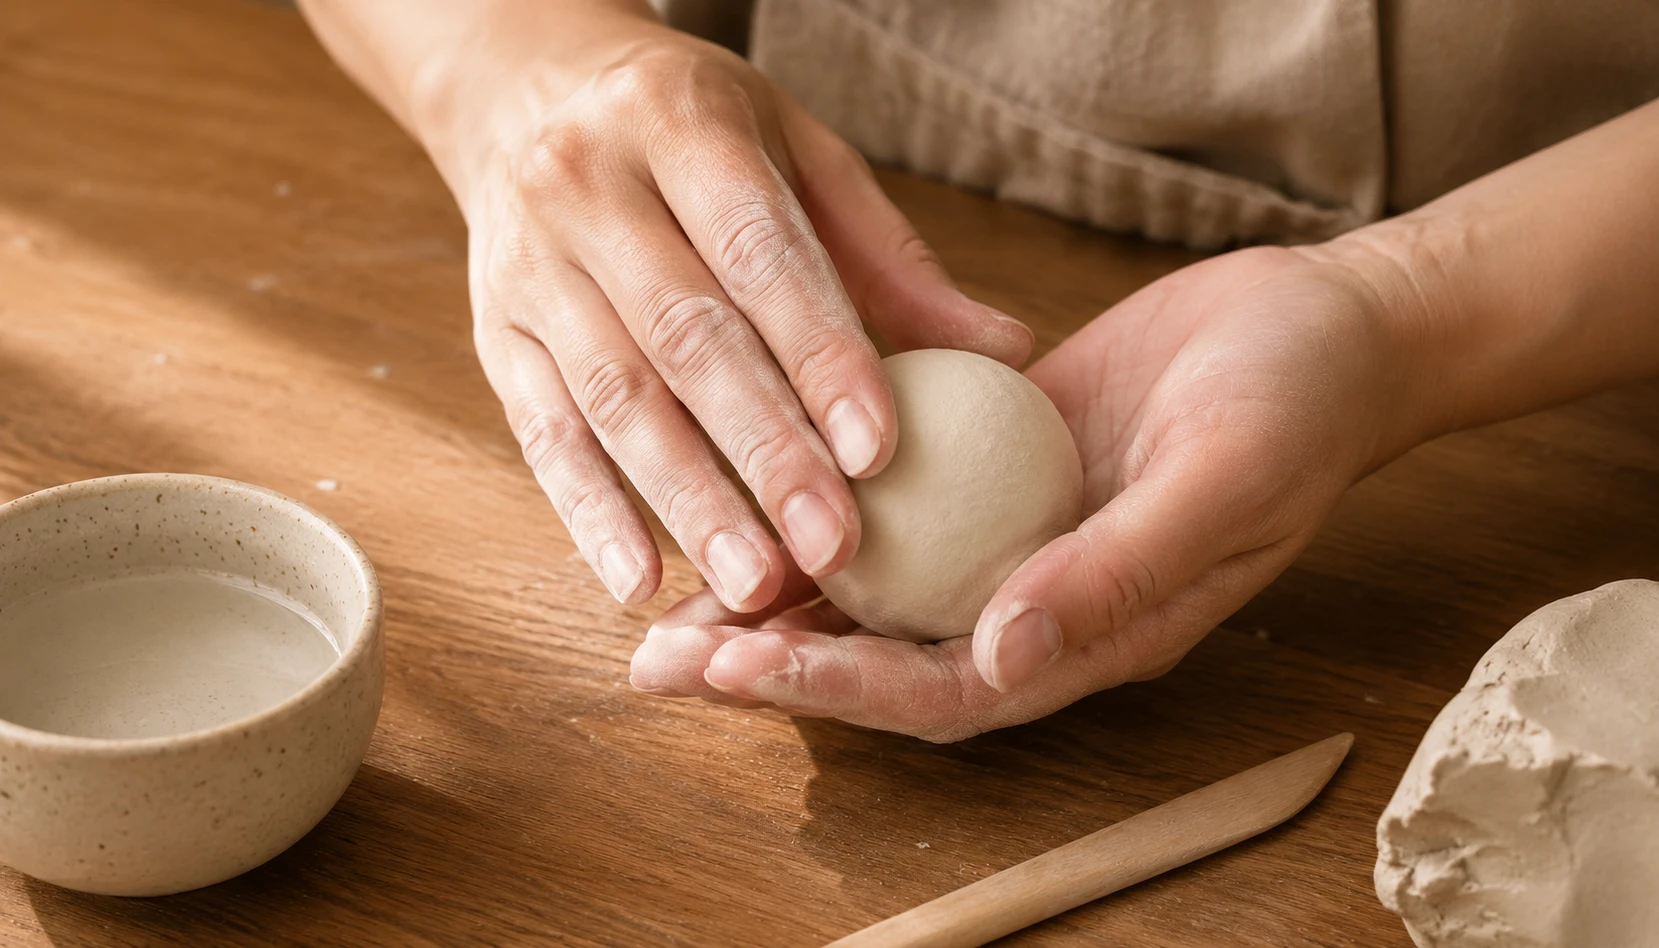
What makes air dry clay such an accessible material for anyone new to crafting comes down to a few things.
No special equipment required. Unlike stoneware or porcelain clay, which needs a kiln to fire, air dry clay hardens naturally over 24 to 72 hours simply by sitting out at room temperature. This means anyone can start creating at their kitchen table with zero investment in equipment.
It is genuinely inexpensive. A one kilogram block of air dry clay typically costs under ten dollars and can produce six or more small projects. Compare this to buying finished ceramic decor pieces, which often cost twenty to sixty dollars each, and the value becomes obvious immediately.
Mistakes become character. Slight texture marks, an uneven edge, a fingerprint pressed into the surface, these imperfections are what give handmade clay pieces their charm. This is a rare craft where you genuinely cannot mess it up beyond repair.
It suits the slow crafting movement. Slow crafting, focusing on the process rather than rushing to a finished product, has become one of 2026’s defining crafting trends. Shaping clay with your hands is meditative and calming, and that’s as much the point as the finished object.
The finish is beautifully organic. Air dry clay dries to a soft, matte, slightly textured finish that pairs perfectly with the warm, natural aesthetic popular in home decor right now, terracotta, linen, natural wood, and dried botanicals.
Projects display beautifully immediately. Unlike crafts that need to be hidden away, these clay pieces are designed to be seen. A ring dish, a candle holder, a small vase, these become part of your everyday decor rather than crafts stored in a drawer.
It’s easy to see why air dry clay has become such a defining craft trend this year: it’s accessible, it’s cheap, and the results actually look like something.
What You Need to Get Started
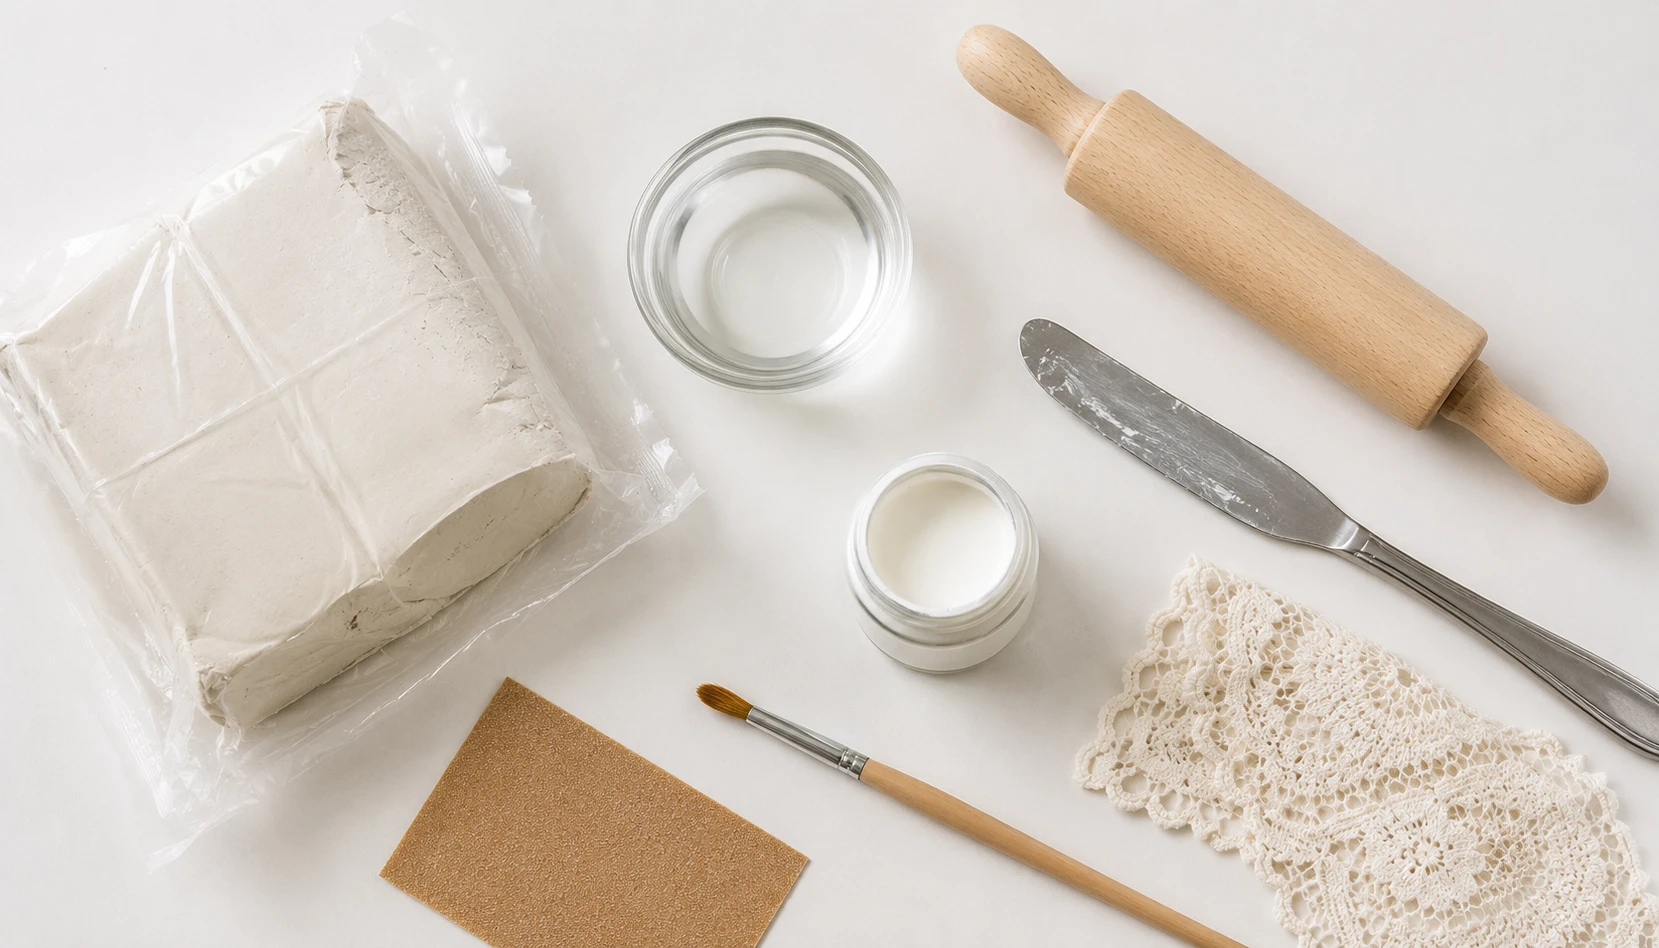
One of the best things about this craft is how minimal the supply list is. Here is everything you actually need.
Air dry clay. Available at any craft store or online, usually in white, terracotta, or grey. White clay is the most versatile since it takes paint beautifully. Start with one kilogram, which is enough for several projects.
A small bowl of water. Used for smoothing seams, softening edges, and helping pieces stick together. This is your most-used tool throughout the entire process.
A rolling pin. A dedicated craft rolling pin works best, but any smooth cylindrical object, even a clean glass bottle, works for rolling clay to an even thickness.
Basic shaping tools. A butter knife or clay-specific cutting tool, a few round objects like bowls or cups for shaping curves, and something with texture like lace, leaves, or fabric for pressing patterns into wet clay.
Sandpaper. Fine grit sandpaper, around 220 grit, smooths rough edges and blemishes once pieces are fully dry, giving them a more polished, professional finish.
Acrylic paint and a sealer. Once dry, pieces can be painted in any color and finished with a clear sealer like Mod Podge or acrylic varnish to protect the surface and add durability.
A clean, flat surface. Parchment paper or a silicone mat protects your table and prevents clay from sticking while you work.
That is genuinely the complete list. No kiln, no pottery wheel, no expensive equipment, just these simple materials and a few hours of your time.
The Ring Dish: Beginner’s Best First Project
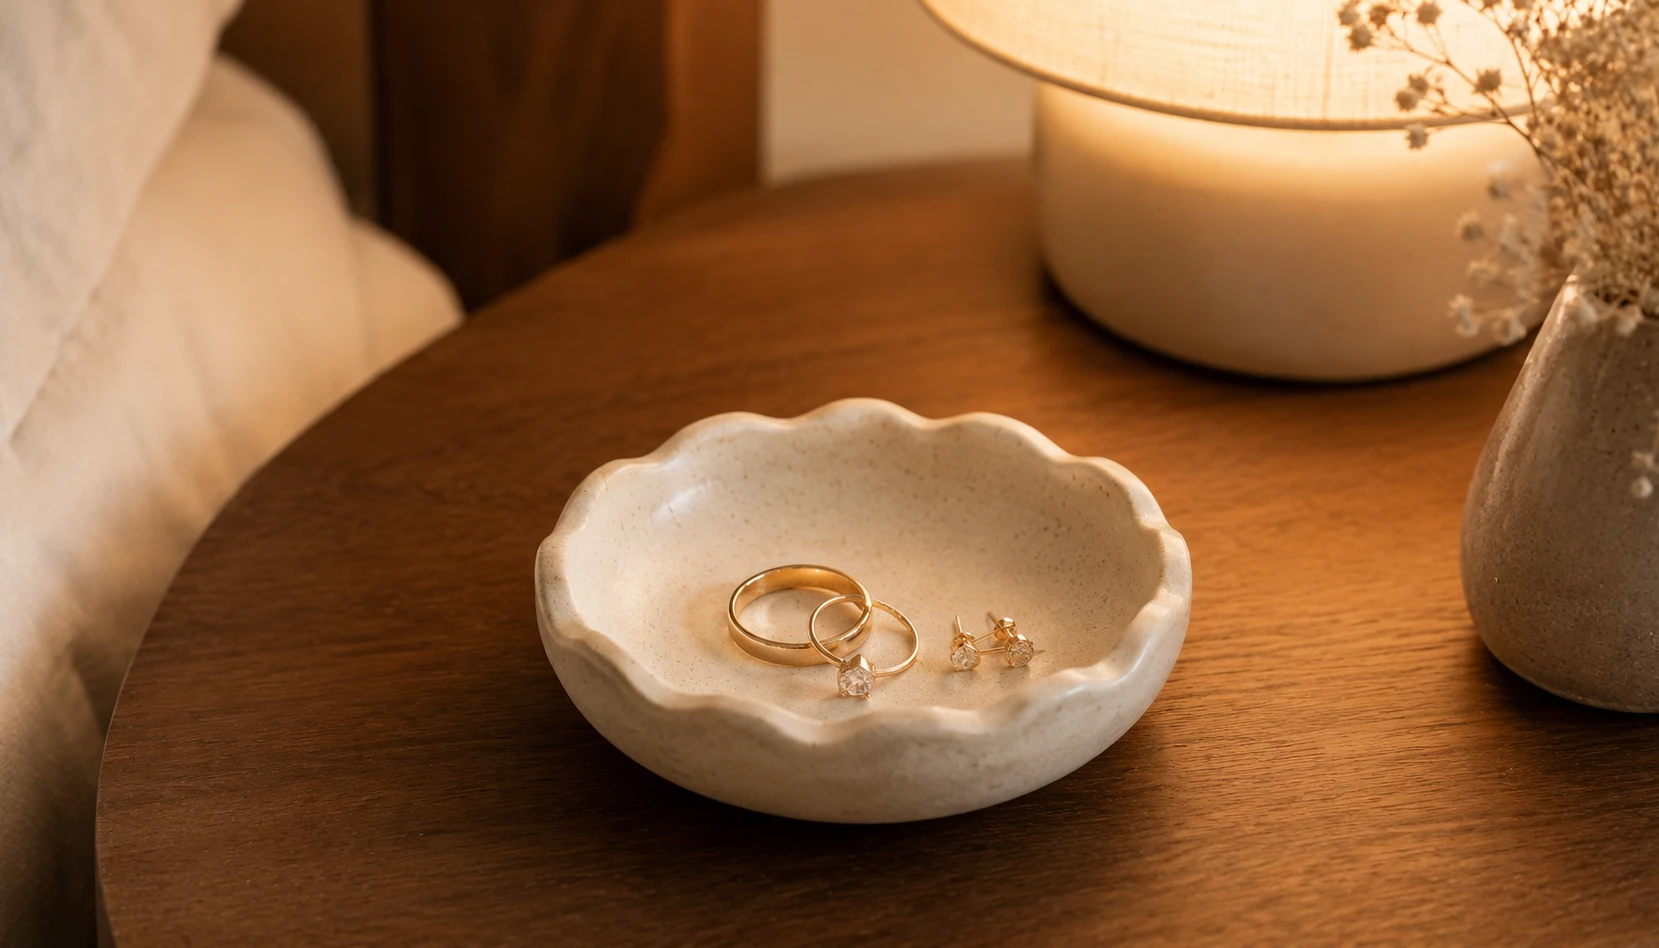
If you make only one project from this list, make a ring dish. It is quick, forgiving, and immediately useful, which makes it the ideal way to learn the basics of working with clay.
How to make it:
Roll a ball of clay and flatten it with your rolling pin to about one quarter inch thickness. Use a bowl or round template to cut a clean circle. Gently press the circle into the inside of a small bowl lined with parchment paper, this creates the shallow curved shape that makes a proper dish rather than a flat disc.
Smooth the edges with a damp finger to remove any rough lines from cutting. If you want to personalize it, this is the moment to press a small stamp, a word, or a simple pattern into the still-soft clay.
Leave the dish inside the bowl mold until it has firmed up enough to hold its shape on its own, usually a few hours, then remove it from the bowl and let it finish drying completely on a flat surface, which typically takes one to two more days.
Finishing touches. Once fully dry, lightly sand any rough edges, then paint in a single solid color for a modern look, or leave it in its natural clay tone for an earthy, minimal aesthetic. Seal with a matte varnish to protect the surface from everyday use.
Where to use it. A ring dish looks beautiful on a bedside table for jewelry taken off before bed, on a bathroom counter for rings and earrings removed before washing hands, or on an entryway console for keys and small items.
This single project, which takes under thirty minutes of hands-on time, is genuinely one of the most rewarding first crafts anyone can attempt.
Simple Candle Holders
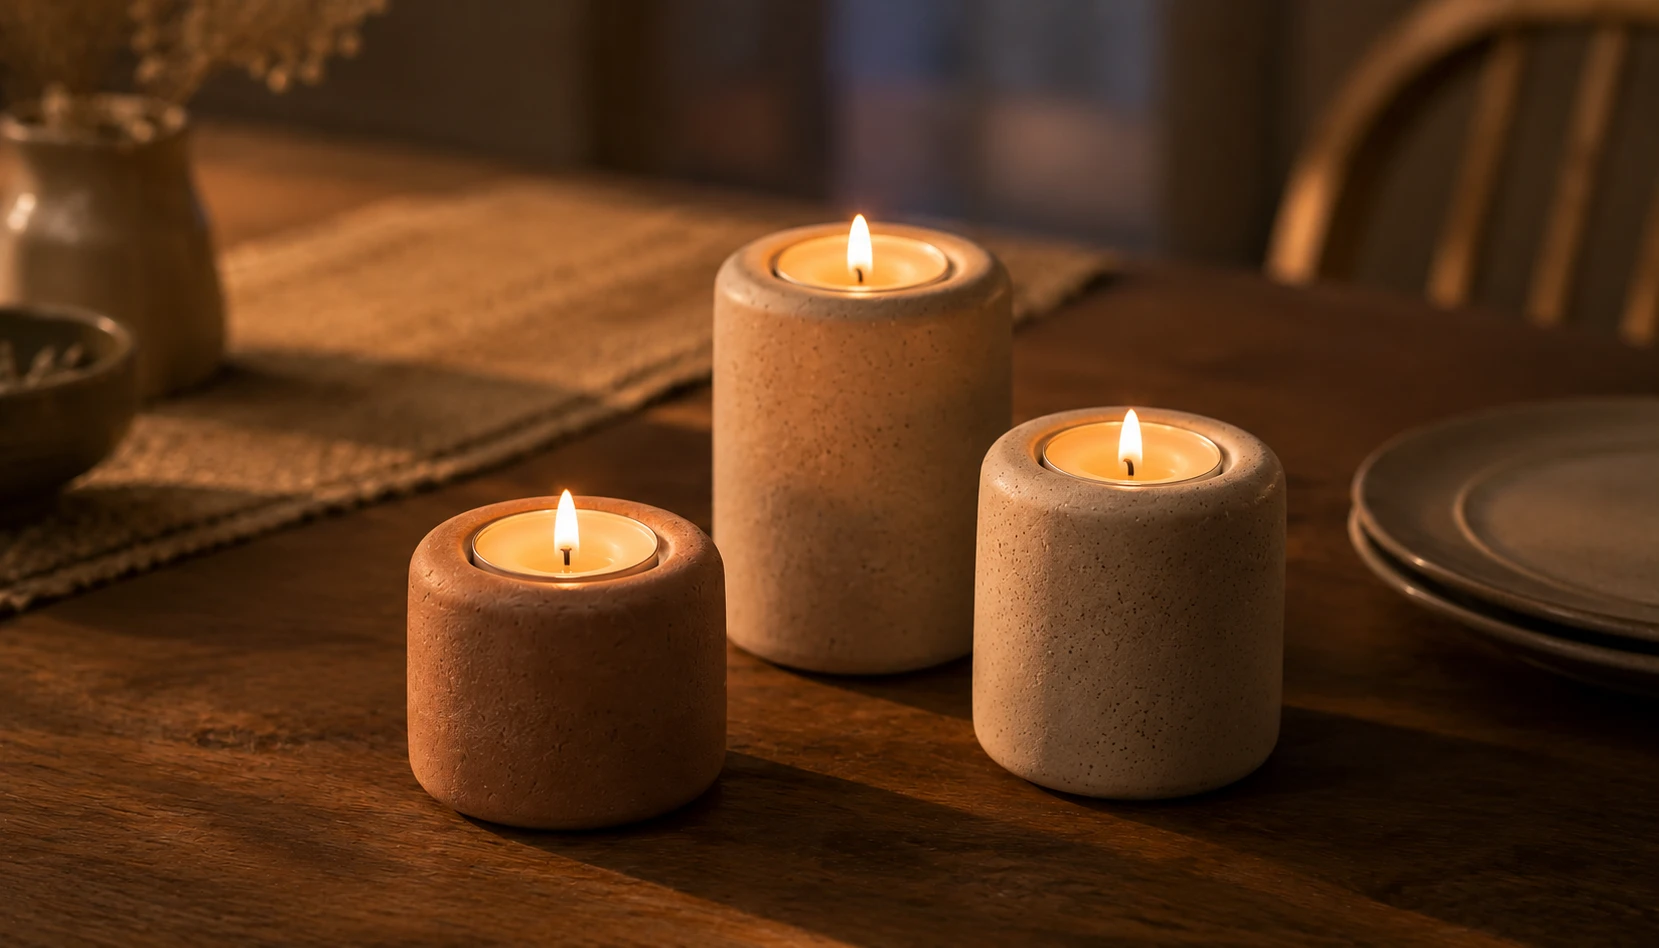
Candle holders are one of the most popular air dry clay projects, and it is easy to see why. They combine function and beauty, and even simple shapes create a genuinely elegant finished piece.
The basic tealight holder. Shape a ball of clay into a rounded base, then press a tealight candle gently into the center to create a snug indentation. Remove the candle before the clay dries completely, leaving a perfect recessed space for it to sit in later. Smooth the outer surface with a damp finger for a polished look.
The taper candle holder. Roll a coil of clay and wrap it around the base of a taper candle to create a fitted collar, leaving slightly more room than the candle’s exact width since clay shrinks a little as it dries. Attach this collar to a flat clay base using a small amount of clay mixed with water as natural glue, scoring both surfaces first to help them bond.
Textured variations. Press lace, leaves, or textured fabric into the wet clay surface before it sets for a detailed finish that looks like far more effort went into it than actually did.
Grouping for impact. Make three or four holders in slightly different heights and finish them in the same color family for a cohesive, designer-looking cluster on a dining table or mantel.
Safety note. Always ensure the base is wide and stable enough to prevent tipping, and never leave a burning candle unattended, especially with handmade holders where wall thickness can vary slightly.
A simple trio of clay candle holders, made in an afternoon, brings a warm, handcrafted glow to any room once evening light fades.
Trinket Trays for Everyday Essentials
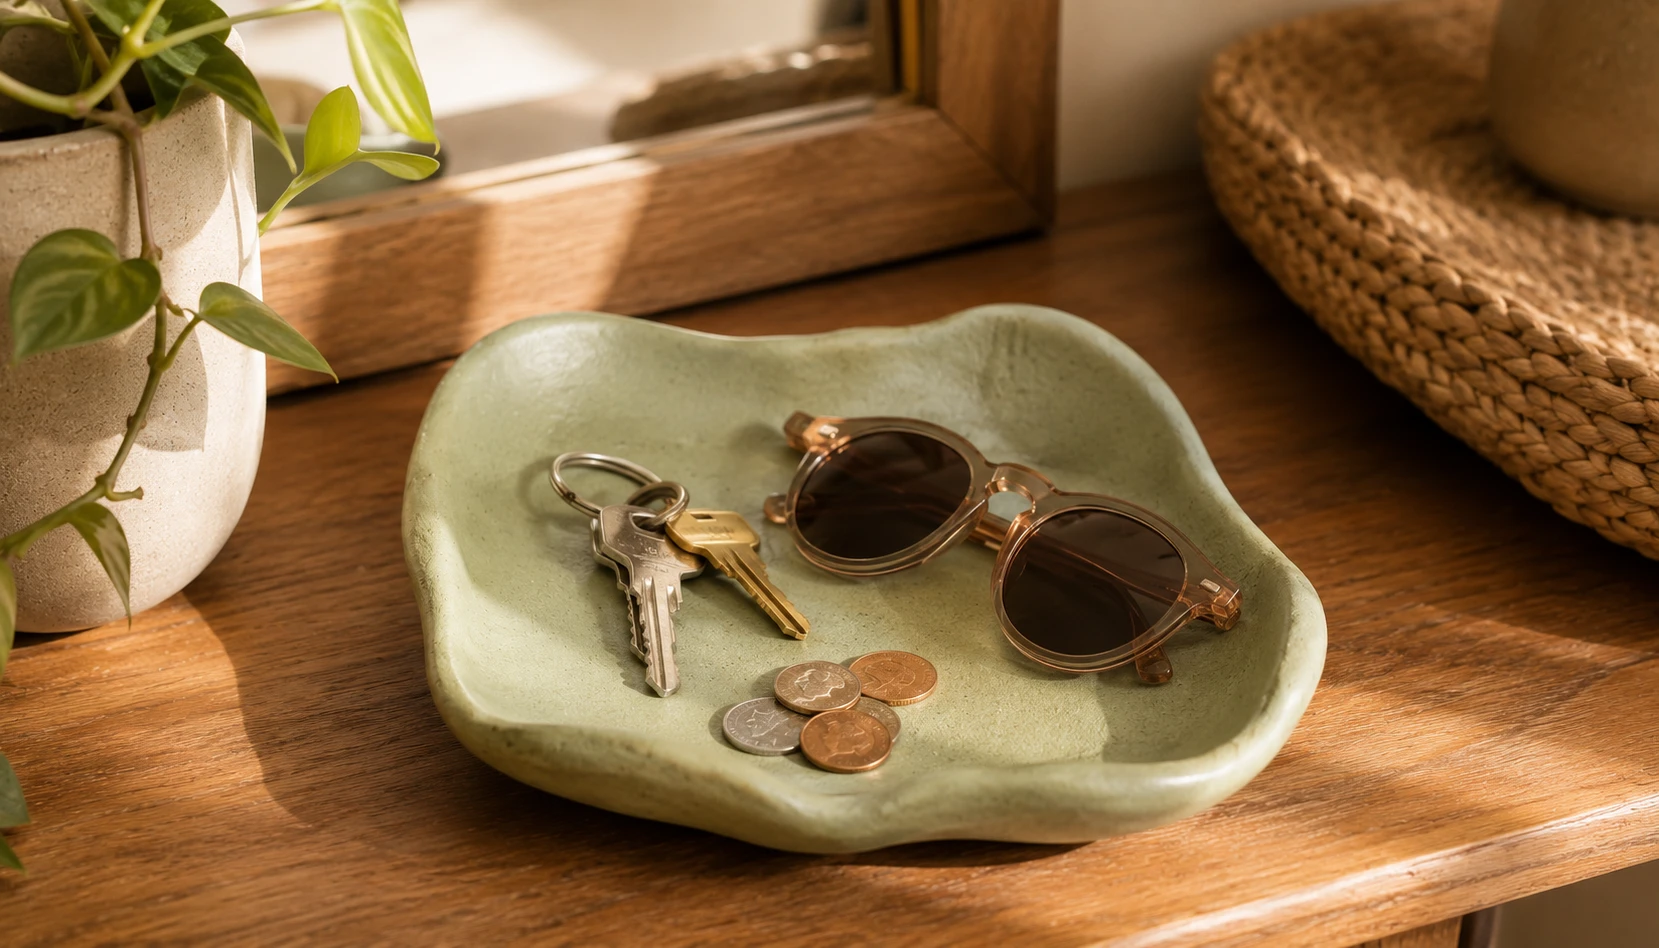
A trinket tray is essentially a slightly larger, flatter version of the ring dish, perfect as a catch-all for the small items that otherwise clutter counters and console tables.
How to make it: Roll clay to an even quarter inch thickness and cut a freeform or geometric shape, ovals and soft rectangles tend to look the most elegant. Gently curl the edges upward while the clay is still pliable, using your fingers or the edge of a spoon to create a shallow lip that keeps small items contained.
Adding texture. Press a piece of textured fabric, a leaf, or lace into the surface before shaping the edges for a textured pattern that catches the light in a subtle, understated way.
Sizing for purpose. A small four-inch tray works well for rings and earrings by a sink. A larger eight-inch tray becomes a proper entryway catch-all for keys, sunglasses, and mail.
Color and finish ideas. Leave in natural clay tone for an earthy, minimalist look. Paint in a single warm neutral like terracotta or sage green to match existing decor. A marbled finish, achieved by lightly swirling two paint colors together before it fully dries, creates an especially elegant, boutique-looking result.
Where it shines. Entryway consoles, bathroom counters, bedside tables, and kitchen counters near the door are all perfect homes for a tray that makes daily clutter look intentional rather than messy.
This is one of the most genuinely useful projects on this list, solving a real organizational problem while adding handmade beauty at the same time.
Textured Coasters
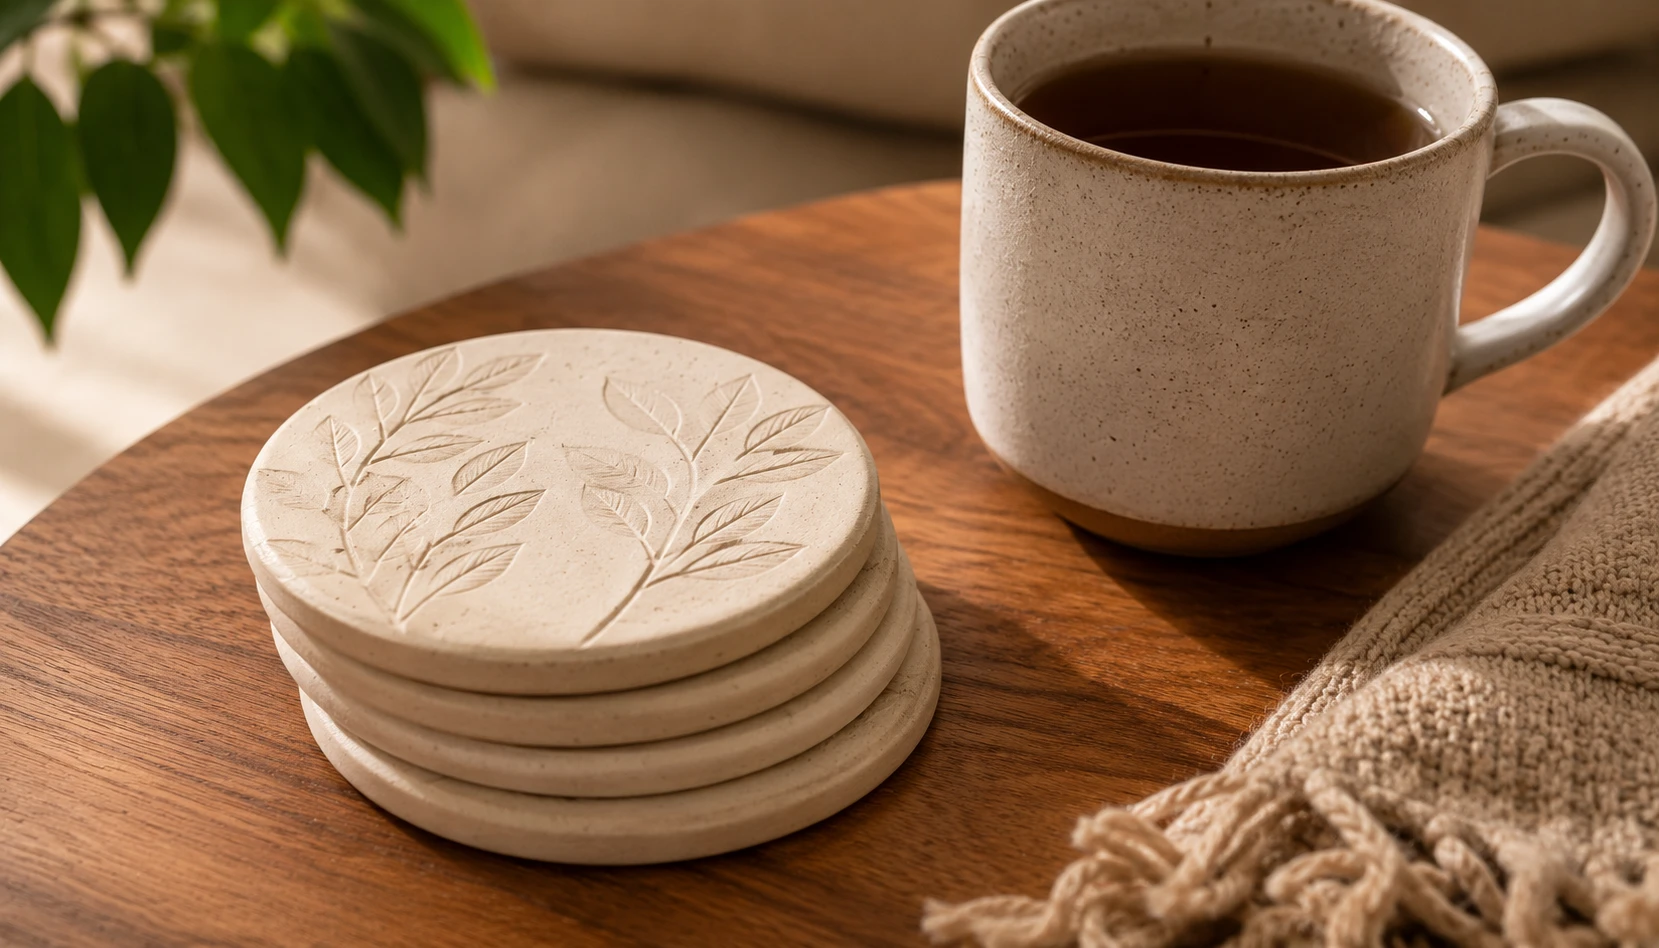
Coasters are a wonderfully practical air dry clay project, and making a full set is barely more effort than making one.
How to make them: Roll clay evenly to about a quarter inch thickness. Cut circles using a bowl, glass, or round cutter of consistent size so your full set matches. Press a textured object, a real leaf, a piece of lace, or a stamp, firmly into each circle to create a repeated pattern across the set.
Keeping them uniform. Use the same cutter and the same texture across all four to six coasters in a set for a cohesive, intentional look rather than a random assortment.
Drying flat. Coasters need to dry completely flat to avoid warping, so lay them on a perfectly level surface and avoid moving them until fully hardened, which typically takes two to three days for this thickness.
Sealing is essential. Because coasters will contact moisture from cold and hot drinks, seal both sides thoroughly with a waterproof sealer or several coats of varnish. Without proper sealing, clay coasters can absorb condensation and soften over time.
Gift potential. A set of four matching handmade coasters, tied with twine or presented in a small box, makes a genuinely thoughtful, personal gift that costs only a few dollars in materials.
Coasters prove that a craft project does not need to be purely decorative. Functional handmade pieces often become the most-used and most-loved items in a home.
Small Bud Vases
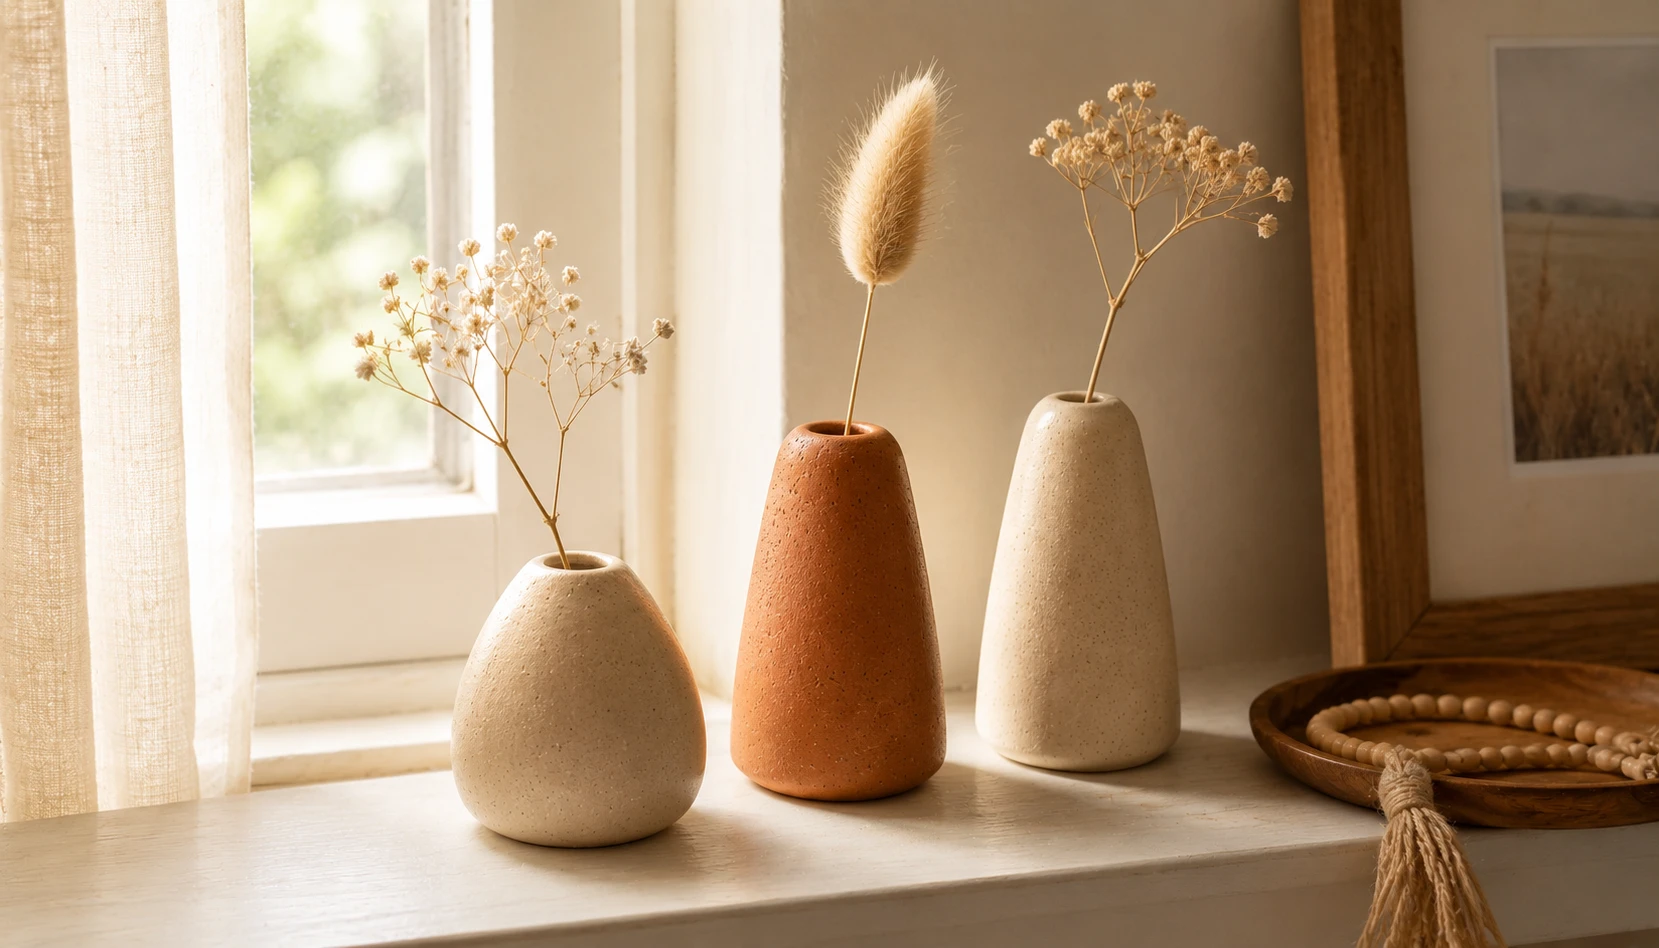
Bud vases are slightly more advanced than flat projects since they involve building up walls, but they remain very achievable for beginners and produce a genuinely impressive result.
How to make them: Start with a ball of clay and use your thumb to press a hole into the center, gradually pinching and turning to build up the walls into a small cup shape. Keep walls a consistent thickness throughout to prevent cracking during drying.
Alternative coil method. Roll thin coils of clay and stack them in a spiral, smoothing the seams together with a wet finger as you build upward. This method gives more control over the exact shape and height.
Sizing consideration. Keep these vases small, designed for a single stem or a small handful of dried flowers rather than a full bouquet, since thin clay walls are not strong enough to support heavy, water-filled arrangements safely.
Water safety. Unsealed air dry clay is not fully waterproof, so either use these vases exclusively for dried flowers and stems, or apply multiple coats of a waterproof sealant if you intend to use them with fresh flowers and water.
Styling ideas. A cluster of three or four bud vases in graduated heights, each holding a single dried stem, creates a beautiful, gallery-like display on a windowsill, shelf, or dining table.
Small bud vases are proof that even simple pinch-pot techniques can produce pieces that look like they came from a boutique home shop.
Wall Hanging Art
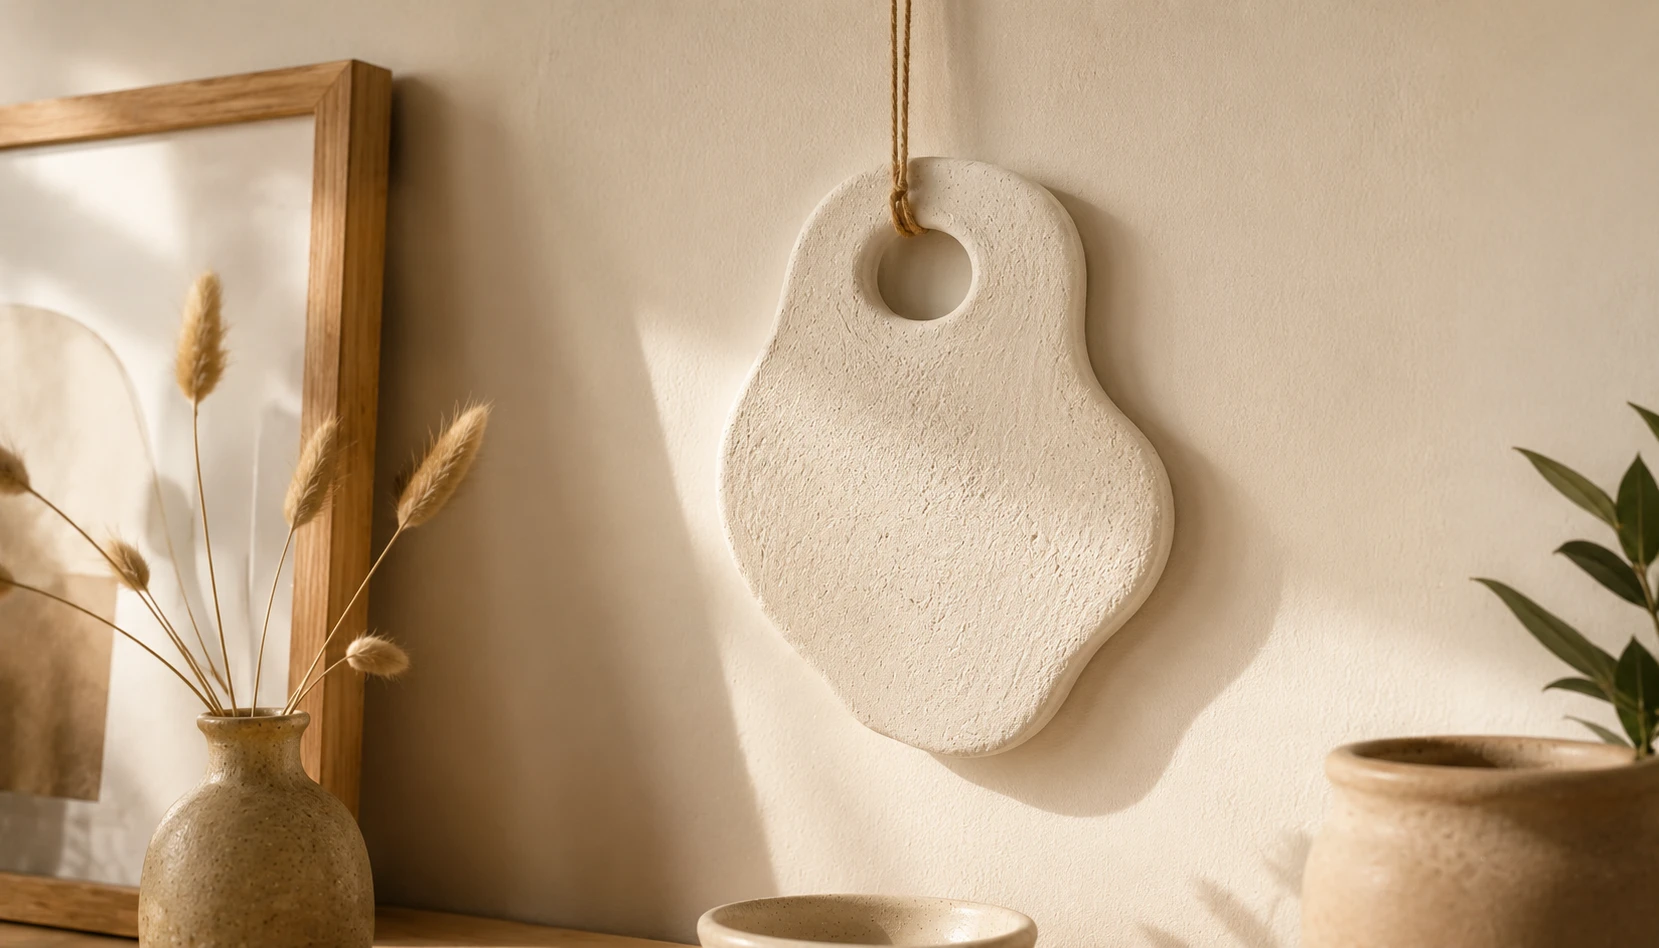
Wall hangings take air dry clay beyond the tabletop, creating sculptural pieces that add texture and visual interest to empty wall space.
How to make them: Roll clay to an even thickness and cut an organic, abstract shape, freeform curves tend to look more sophisticated than rigid geometric shapes. Before the clay dries, use a small tool or straw to punch a hole near the top for hanging.
Adding dimension. Press natural textures like leaves, wood grain, or fabric into the surface for subtle relief detail. Some makers layer thin sheets of clay to create raised patterns for an even more dimensional, gallery-worthy effect.
Hanging methods. Once dry and painted, thread natural cord, leather cord, or a delicate chain through the punched hole for hanging. A small dowel with the clay piece suspended from cord across it creates a more sculptural, macrame-inspired presentation.
Color and finish. A single neutral tone, warm white, sand, or terracotta, keeps the focus on the sculptural shape and texture. Metallic gold accents on raised details add a subtle, elevated touch.
Grouping for impact. A cluster of three or five wall hanging pieces in varying sizes and organic shapes creates a striking, gallery-style arrangement above a sofa, bed, or console table.
This project takes air dry clay from simple functional objects into genuine wall art. It says something about how versatile this humble material really is. If you love displaying handmade pieces, see our guide to decorative plate wall ideas for another gallery display technique worth trying.
Drying and Troubleshooting
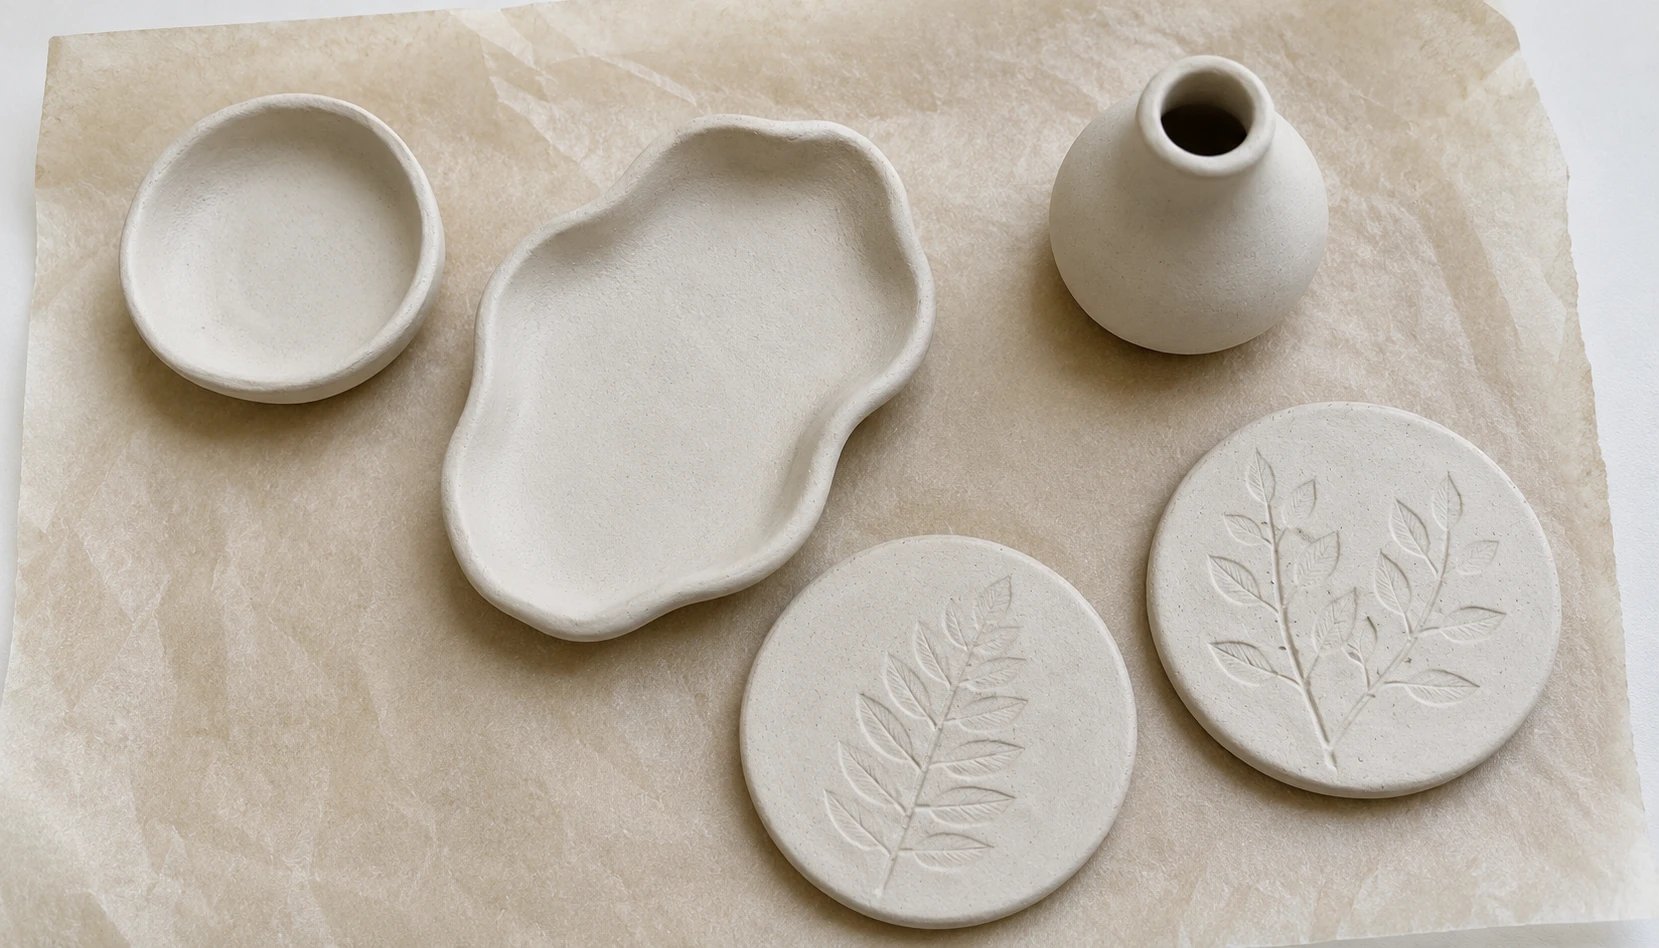
Drying is where most beginner frustrations happen, but understanding a few key principles prevents nearly all common problems.
Dry slowly and evenly. Never place clay near direct heat or in sunlight to speed up drying. Rapid drying causes the outer surface to harden while the inside remains wet, leading to cracks as the piece continues to dry unevenly.
Keep thickness consistent. Uneven thickness is the single most common cause of cracking. Thin sections dry and shrink faster than thick sections, creating internal stress that cracks the piece. Aim for consistent thickness throughout any single project.
Flip for even drying. For flat pieces like coasters and trays, flip them periodically during the drying process so both sides are exposed to air evenly, preventing warping from one side drying faster than the other.
Expect some shrinkage. Air dry clay typically shrinks slightly as the water content evaporates. When making pieces meant to fit something specific, like a candle holder collar, leave a little extra room to account for this natural shrinkage.
Patience with drying time. Small, thin pieces may dry in 24 hours, while larger or thicker projects like vases and trays can take three to five days to dry completely. Rushing this process is the most common reason for cracks appearing later.
Fixing small cracks. If a small crack appears while still slightly damp, smooth a bit of clay slip, a paste made from clay and water, into the crack and gently blend it in. Once fully dry, small cracks can also be filled with a bit of spackle or wood filler before painting.
Understanding these principles turns air dry clay from a frustrating trial-and-error material into a genuinely predictable, enjoyable craft.
Painting and Sealing Your Pieces
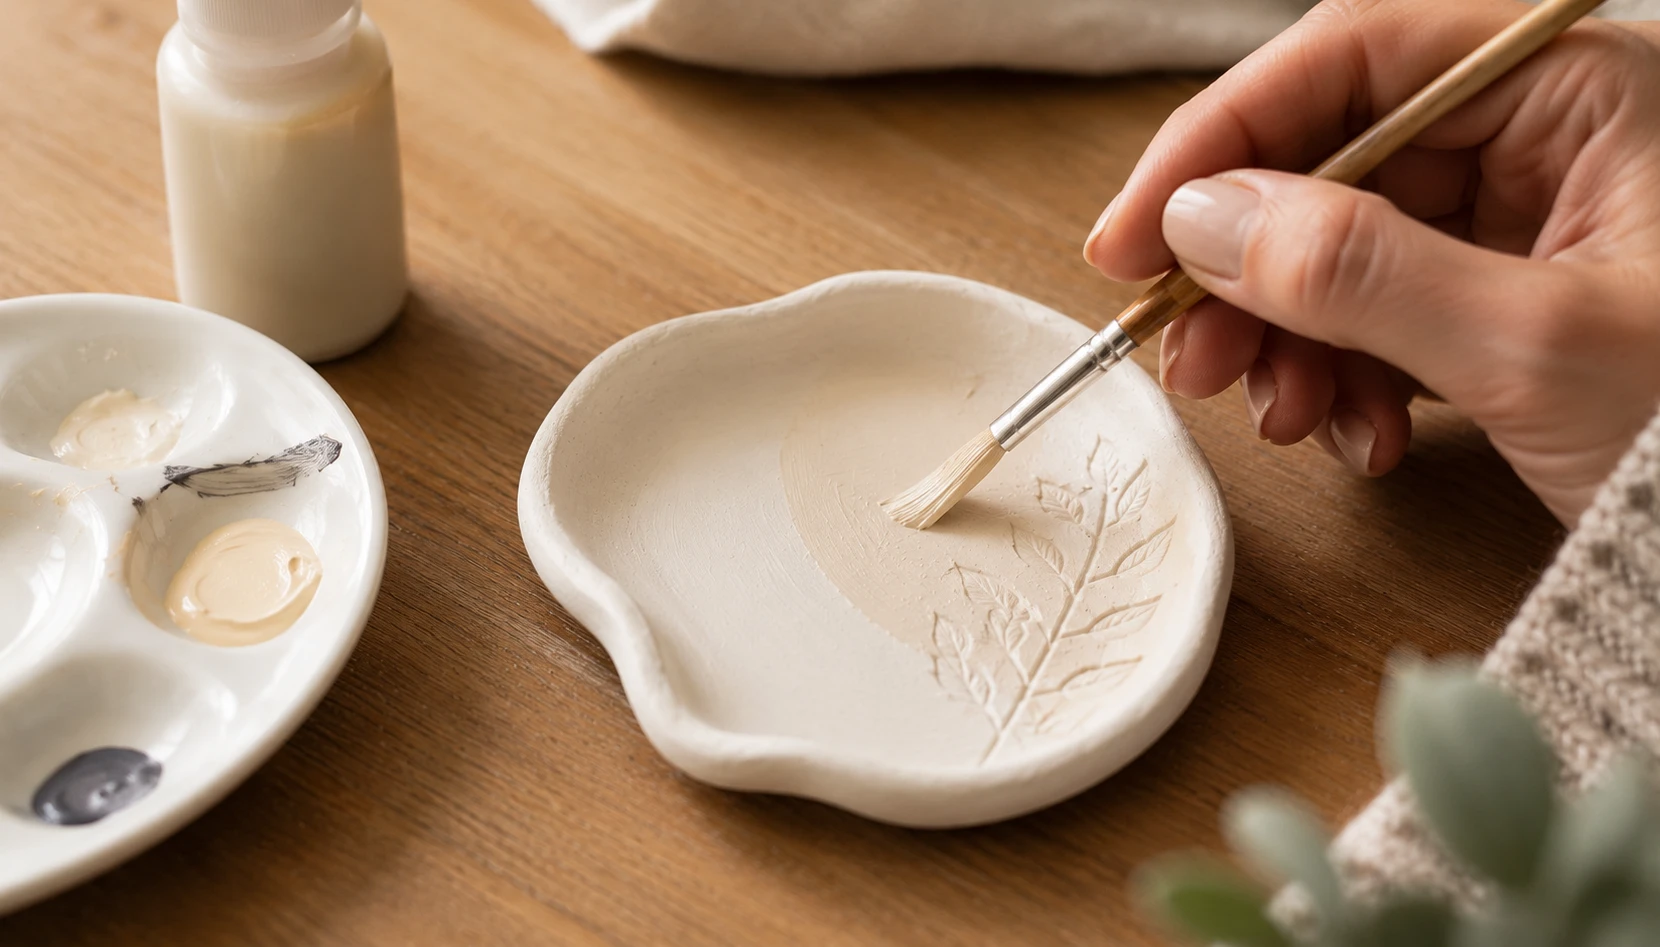
Once your piece is fully dry, painting and sealing is the step that makes it look intentionally designed instead of like a craft project.
Sand first. Before painting, lightly sand the entire surface with fine grit sandpaper to smooth any rough patches or fingerprints, giving paint a clean, even surface to adhere to.
Acrylic paint works best. Ordinary craft acrylic paint adheres beautifully to dried clay and comes in nearly any color imaginable. Apply in thin, even coats, allowing each to dry before adding another for the smoothest finish.
Consider leaving it natural. Not every piece needs paint. The soft, matte, slightly textured look of unpainted dried clay fits beautifully into warm, earthy, organic decor styles and can be just as striking as a painted finish.
Popular finish techniques. A single solid neutral color feels modern and cohesive. A two-tone dip effect, painting only the bottom third in a contrasting color, adds visual interest. Metallic gold or brass paint on edges or raised details adds a subtle luxe touch.
Sealing is essential. A clear matte or satin sealer, whether Mod Podge, acrylic varnish, or a dedicated ceramic sealer, protects the painted surface from scuffs, dust, and minor moisture exposure. Apply at least two thin coats, allowing full drying between each.
Extra protection for functional pieces. Items that will see regular handling or occasional moisture, like coasters or trinket trays, benefit from an additional waterproof sealant layer beyond the standard varnish.
This finishing stage is quick, usually adding only another day for full drying, but it makes the difference between a craft project and a piece that looks like it belongs in a design magazine.
Styling Your Finished Pieces
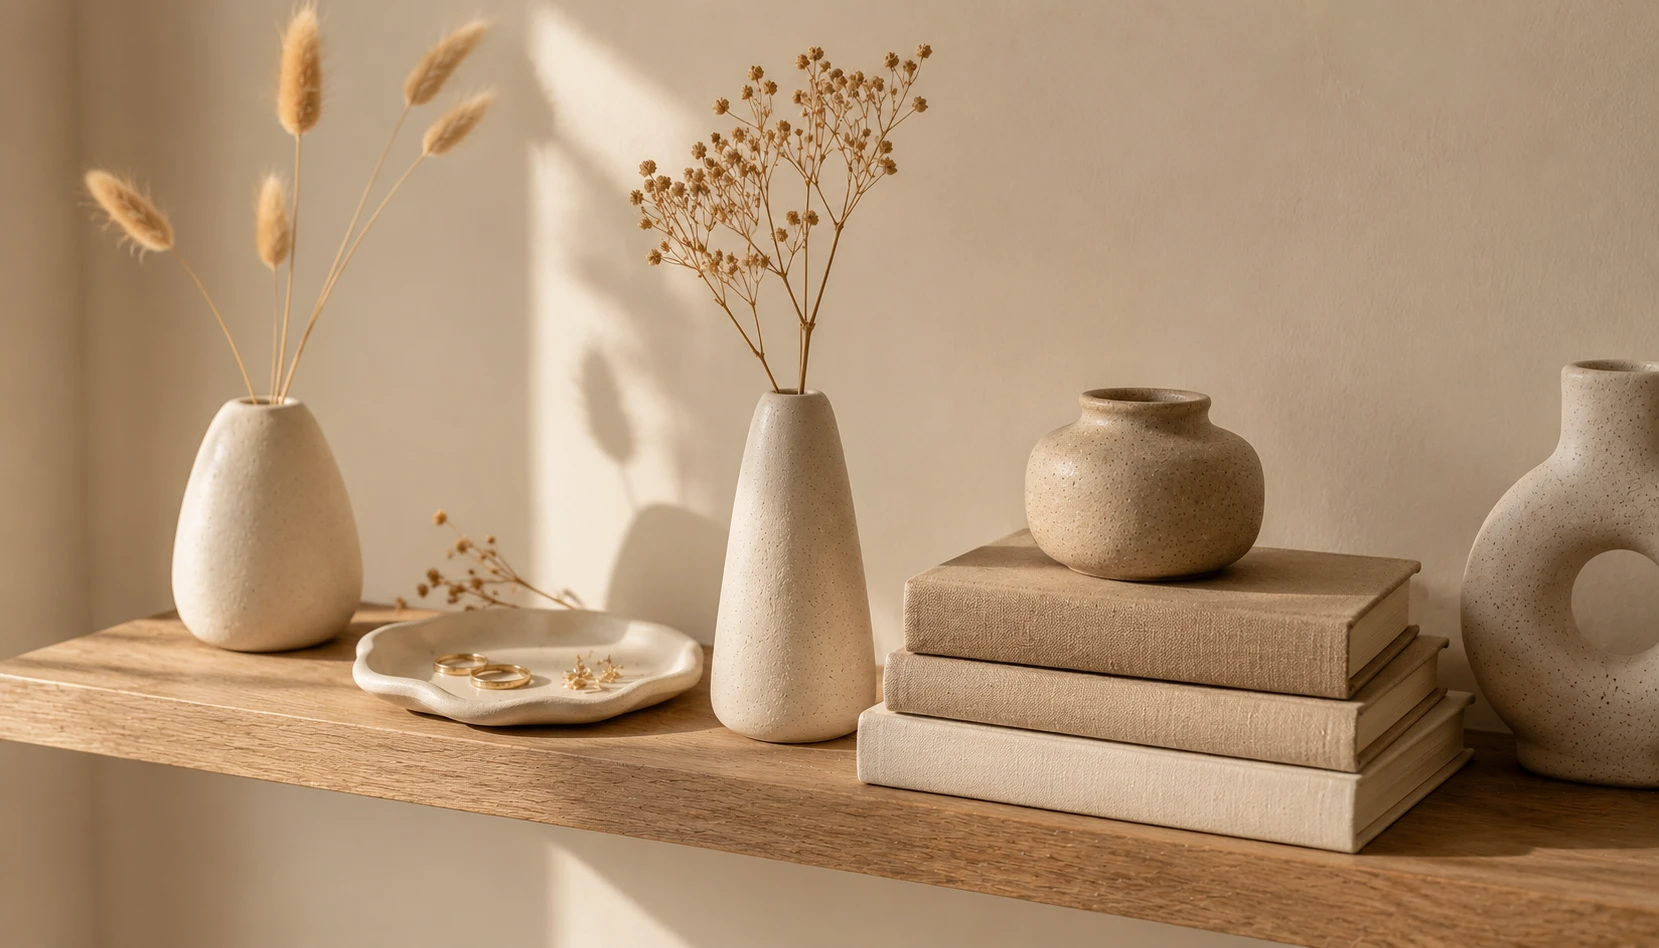
Once you have a small collection of handmade pieces, how you style them determines whether they feel like intentional decor or forgotten craft projects.
Group in odd numbers. Three candle holders, three bud vases, or three trinket trays together look more curated and intentional than a single scattered piece or an even pairing.
Vary the heights. When grouping multiple pieces, choose or arrange items at different heights to create visual rhythm rather than a flat, uniform line.
Pair with natural elements. Dried flowers, a small stack of linen-bound books, and natural wood surfaces all support the organic, handmade quality of clay pieces instead of competing with it.
Choose a cohesive color story. If you have made several pieces over time, unify them with a shared color palette, all in warm neutrals, or all featuring the same accent color, so the collection reads as intentional rather than random.
Give pieces purpose. A ring dish belongs where jewelry is actually removed. A trinket tray belongs where keys are actually dropped. Functional placement makes handmade pieces part of daily life rather than untouched display objects.
Rotate and refresh. Since these pieces are inexpensive and quick to make, feel free to rotate your collection seasonally, swapping in new colors or shapes as your decor evolves.
The goal is for these pieces to feel like they were always meant to be there. Their appeal comes precisely from the visible mark of having been made by hand. For more ideas on styling handmade and natural decor together, see our guide to room decoration ideas for small spaces.
Common Beginner Mistakes
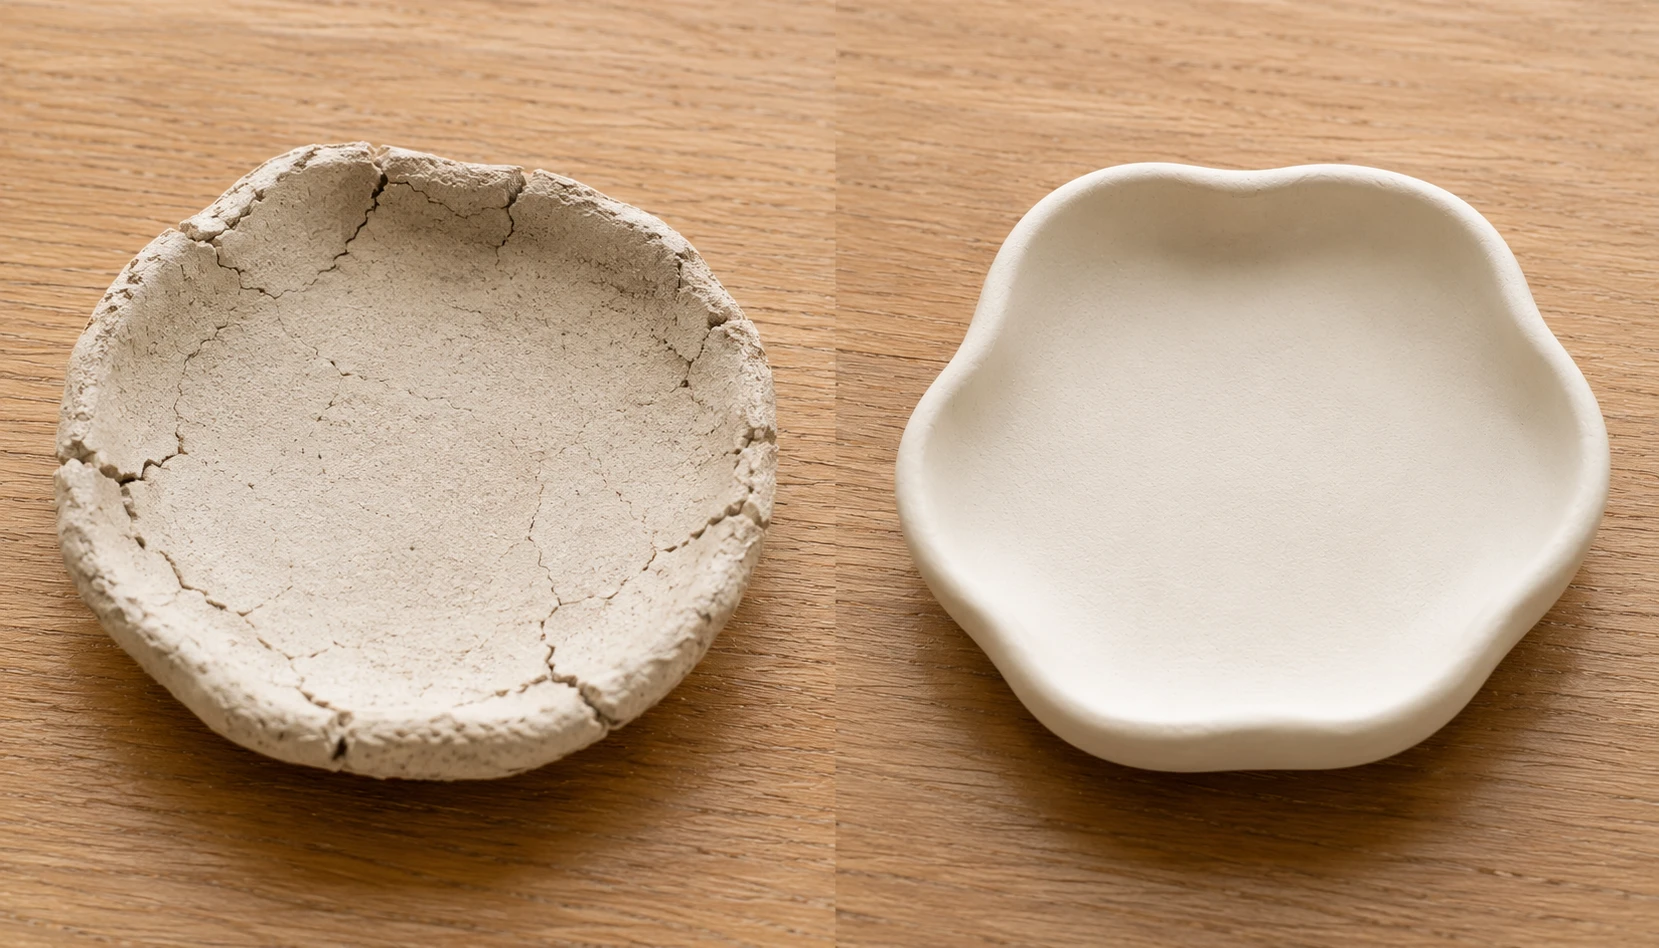
Even simple crafts have a learning curve. Here are the mistakes that trip up most beginners, and how to avoid them.
Mistake 1: Working with clay that has started to dry out. Air dry clay begins hardening the moment it is exposed to air. Always keep unused clay tightly wrapped in plastic and only remove the amount you need for each step.
Mistake 2: Uneven thickness. As covered earlier, inconsistent thickness is the leading cause of cracking. Take the extra minute to check thickness with your rolling pin guides or a ruler.
Mistake 3: Rushing the drying process. Placing pieces near a heater, in direct sun, or handling them before they are fully dry leads to warping, cracking, and pieces that never achieve their full strength.
Mistake 4: Skipping the sanding step. Painting over rough, unsanded clay results in an uneven, unprofessional-looking finish. The few minutes spent sanding make a significant visual difference.
Mistake 5: Forgetting to account for shrinkage. Clay shrinks slightly as it dries. Projects meant to fit something specific, like candle collars, need extra room built in from the start.
Mistake 6: Insufficient sealing. Skipping or under-applying sealer leaves pieces vulnerable to moisture damage and makes painted surfaces prone to scuffing. Always apply at least two coats.
Mistake 7: Making walls too thin on vases and cups. Thin walls look elegant but are structurally fragile. Beginners should err toward slightly thicker walls until they develop a feel for the material’s limits.
Mistake 8: Expecting perfection. The biggest mindset mistake is expecting factory-smooth results. The handmade imperfections are the entire point, embrace them rather than fighting them.
Air dry clay offers something increasingly rare in home decor: the ability to create genuinely beautiful, personal pieces with your own hands, using inexpensive materials, in a single afternoon. Whether you start with a simple ring dish or work up to a wall hanging sculpture, each piece you make becomes part of your home’s story in a way that store-bought decor never quite achieves.
Start small. Make one ring dish or one set of coasters. Once you feel the satisfaction of a finished piece that you shaped yourself, it becomes very easy to understand why this humble material has become one of the defining crafts of the year.
For more budget-friendly DIY inspiration see our guides on DIY Home Decor Under Twenty Dollars and DIY Dried Flower Arrangements, which pair beautifully with your new handmade clay vases and trays.