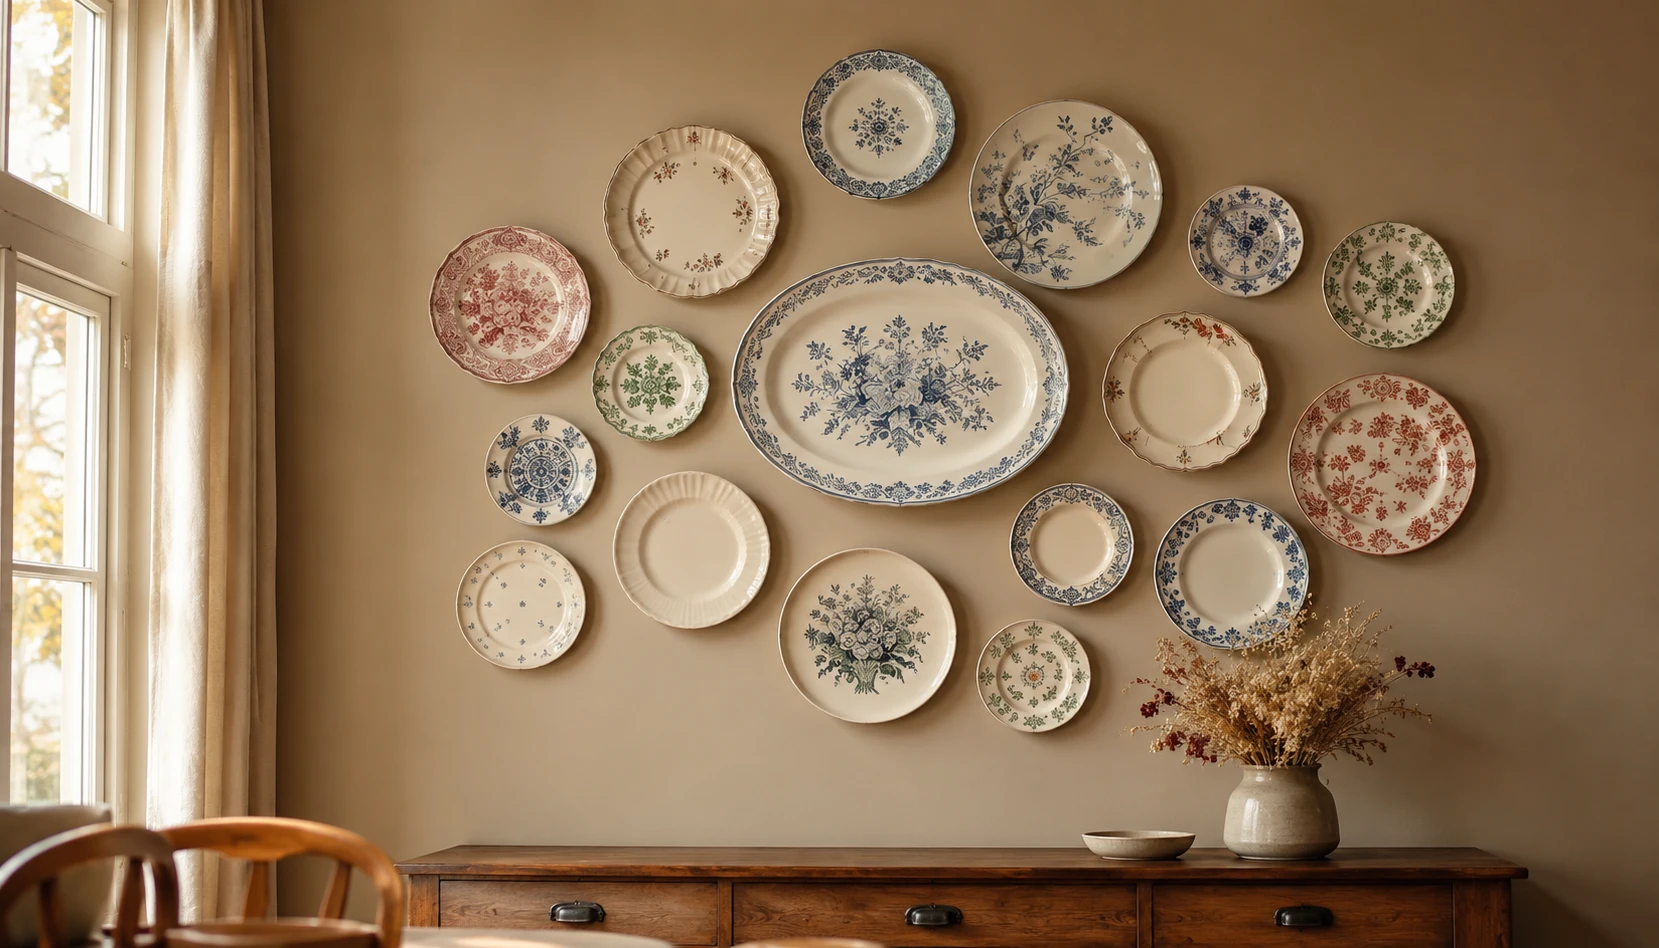
The decorative plate wall is having a genuine moment. What was once considered old-fashioned, formal dining room decor has been reimagined as one of the most personal, characterful ways to fill a wall. Rather than generic framed prints bought to match a color scheme, a plate wall tells a story, grandmother’s china, a plate from a memorable trip, a thrifted find with a beautiful pattern, gathered together into a single meaningful display.
Home decor generally has been leaning toward warmth, tactile materials, and personal storytelling this year, a clear move away from mass-produced, impersonal spaces. Plate walls fit that shift well. They cost little or nothing if you already own pieces, they can be built gradually over months or years, and every plate carries its own history rather than being chosen purely for how it looks on Instagram.
The best part is how forgiving this project is. Unlike hanging a single large piece of art, where placement mistakes are highly visible, a plate wall’s organic, layered nature means small imperfections in spacing or alignment simply add to the collected, lived-in charm that makes this style so appealing.
Here are 12 ideas for creating a decorative plate wall that feels intentional, beautiful, and genuinely personal to you.
Why Plate Walls Are Back
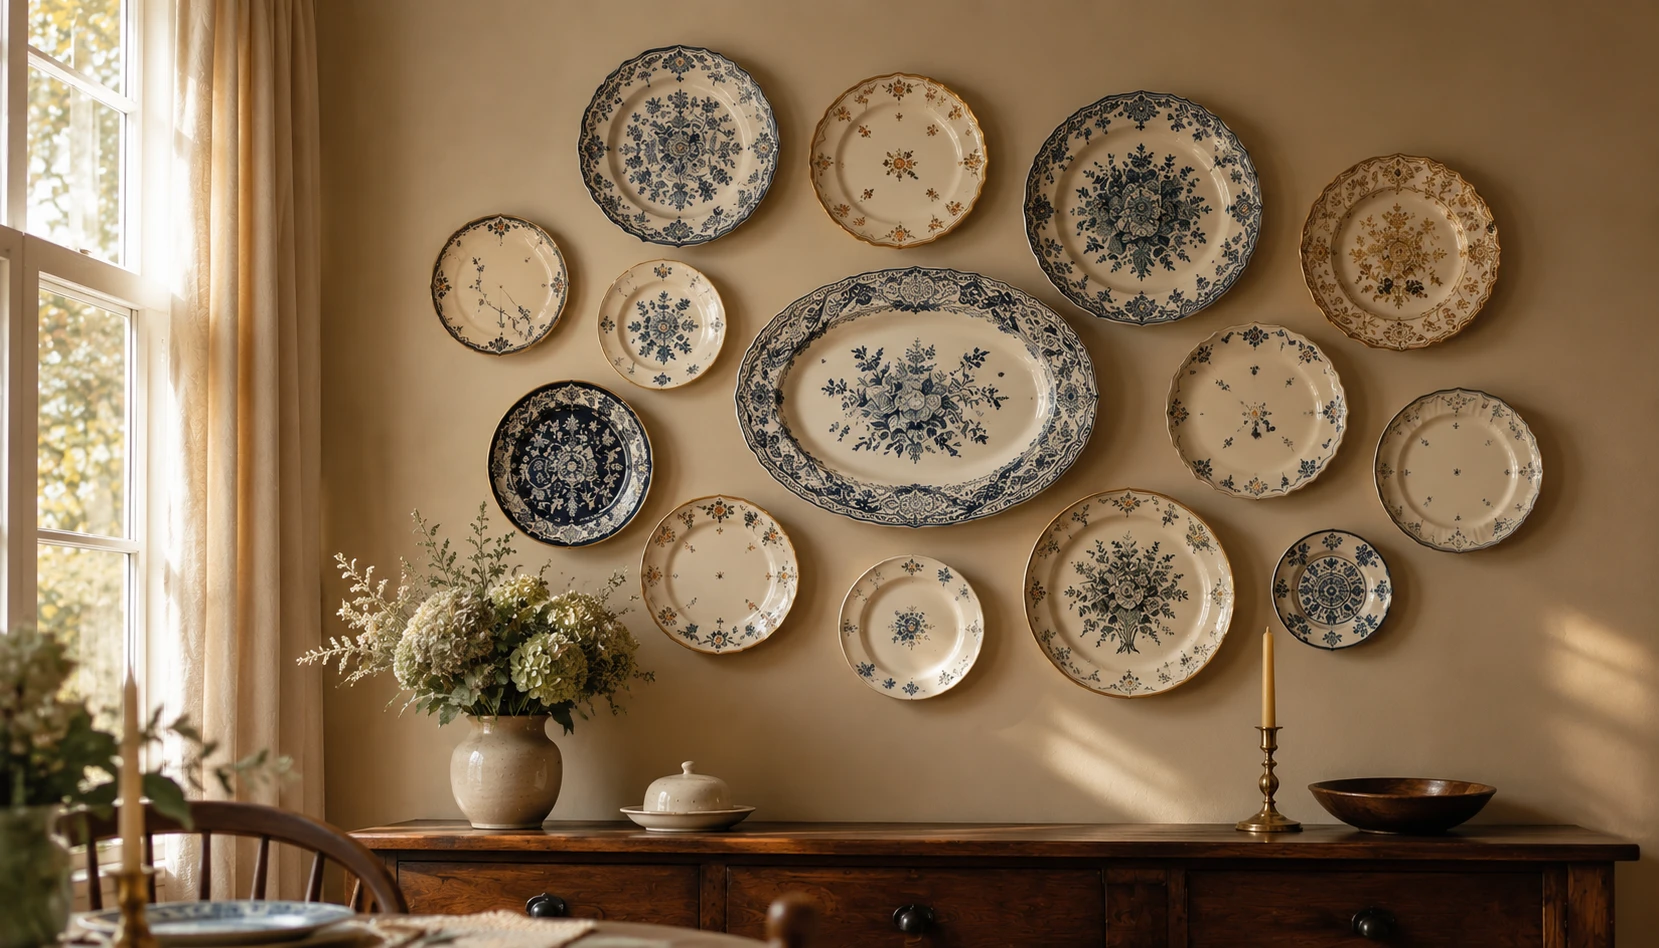
It’s worth understanding why this once-formal decorating tradition has found new life in contemporary homes before getting into specific layouts and techniques.
They tell a personal story. Unlike generic wall art purchased to fill space, plates often carry real history, family heirlooms, travel souvenirs, thrifted discoveries. A plate wall becomes a visual autobiography rather than decoration for its own sake.
They fit the 2026 shift toward warmth and craft. This year’s home decor trends have leaned toward artisanal, handcrafted, personal elements over sleek, impersonal minimalism. Plates, especially vintage or handmade ceramic pieces, capture that warmth directly.
They are remarkably budget-friendly. Many of the most beautiful plate walls are built from thrifted finds costing a few dollars each, or from pieces already sitting unused in a cabinet. This is genuinely accessible decor regardless of budget.
They work in nearly any room. While traditionally associated with dining rooms and kitchens, plate walls now appear in bedrooms, hallways, and living rooms, wherever a collection of meaningful objects deserves to be seen rather than stored.
They can grow over time. Unlike a piece of art that is either finished or not, a plate wall can start small with three or four plates and expand gradually as you find new pieces, making it a genuinely evolving, living display.
They add texture without commitment. For renters or those hesitant to commit to bold paint or wallpaper, a plate wall adds serious visual interest and can be removed entirely without any lasting change to the wall itself.
Plate walls tell a story, cost next to nothing, and can grow slowly over years. That combination is why they’ve moved out of grandmother’s dining room and into some of the most stylish, personality-filled homes being shared today.
Choosing Your Plates
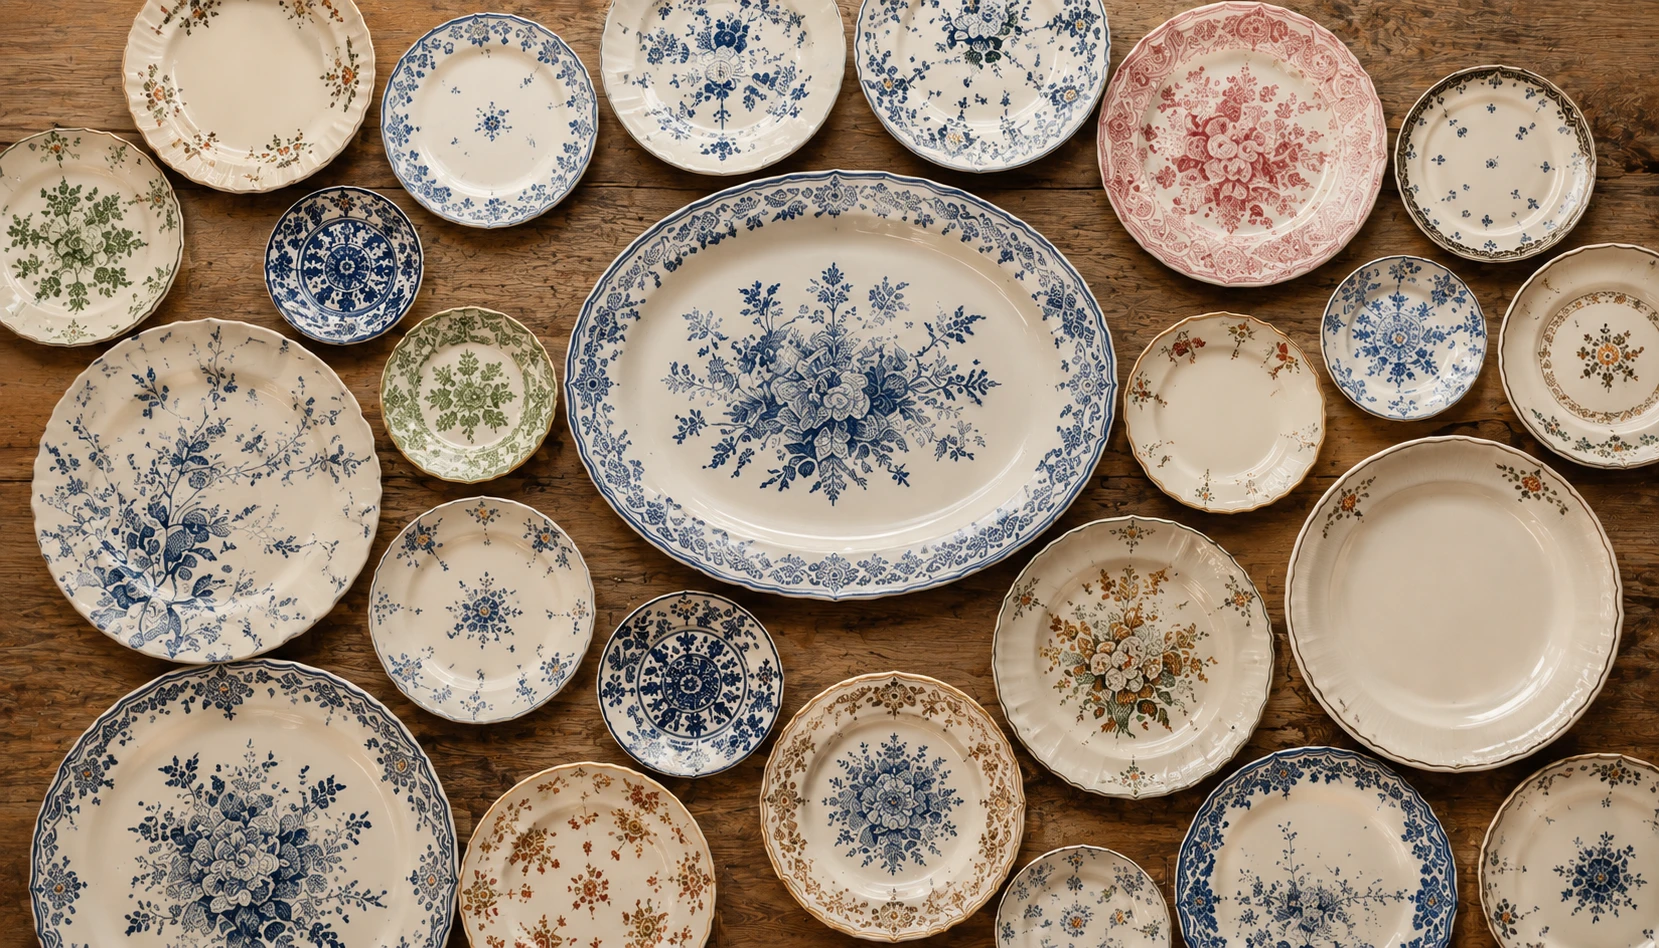
The plates themselves are the foundation of the entire display, and choosing them thoughtfully makes the difference between a curated collection and a random assortment.
Look for a unifying thread. This does not need to be identical patterns. A shared color palette, a common era, a similar decorative style, or simply a collected personal meaning can all serve as the thread that ties mismatched plates together into a cohesive whole.
Mix sizes deliberately. A wall of identically sized plates can feel flat and repetitive. Combining large platters, medium dinner plates, and small saucers creates visual rhythm and makes the largest pieces feel like natural focal points.
Vintage and thrifted pieces add character. Secondhand shops, estate sales, and flea markets are the best sources for plates with genuine history and interesting patterns, often at a fraction of retail prices. Many of the most admired plate walls cost only a few dollars per piece.
Consider weight before falling in love. Very heavy platters need sturdier hanging hardware and wall anchors. If you are new to this project, starting with lighter, mid-sized plates is more forgiving while you learn the hanging process.
Buy a few extras. If you are building a collection gradually, purchase one or two more plates than you think you need for your current layout. Having options when arranging makes the final composition noticeably stronger.
Do not overlook handmade pieces. Ceramic plates from local makers or even your own air dry clay projects can be incorporated alongside vintage china for a layered, artisanal mix that feels especially current for 2026’s handcrafted aesthetic.
Building a collection you genuinely love, rather than buying purely to fill wall space, is what gives the finished display its authentic, personal quality.
Planning Your Layout
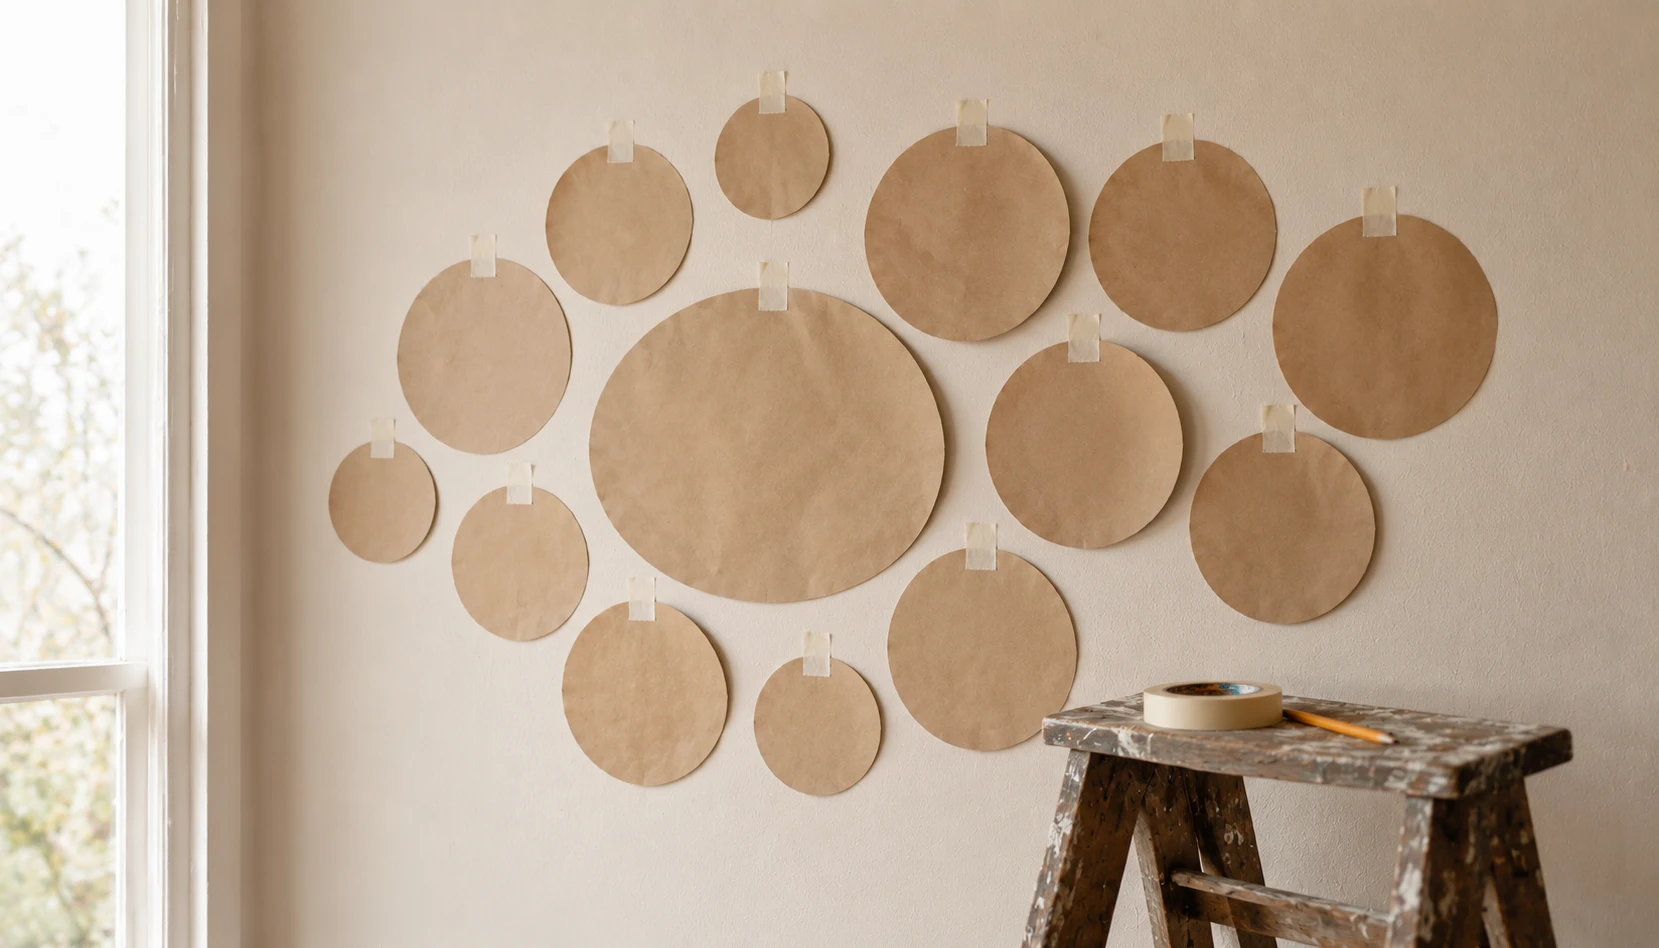
The single most important step in creating a beautiful plate wall happens before a single nail goes into the wall, planning the layout carefully using templates.
Start on the floor. Lay all your plates out on the floor or a large table first, arranging and rearranging until you find a composition that feels balanced. This lets you experiment freely without any commitment or risk.
Trace paper templates. Once you have a layout you like, trace the outline of each plate onto kraft paper or the back of wrapping paper and cut out the shapes. Label each template with the corresponding plate if you have many similar sizes.
Tape templates to the wall. Use painter’s tape to attach your paper templates to the wall in your planned arrangement. This is the crucial step that lets you see the composition at true scale and make adjustments with zero commitment.
Live with it for a few days. Resist the urge to hang everything immediately. Leaving the taped templates up for a day or two lets you notice the arrangement at different times of day and decide if anything needs shifting.
Mark hanging points. Once satisfied, mark a small pencil dot at the top center of each template directly on the wall before removing the paper, giving you the exact point for each hanger.
Establish the anchor height. A common rule of thumb is centering the overall arrangement at roughly fifty-seven to sixty inches from the floor, close to average eye level, though this can shift based on furniture below the display.
This planning stage takes patience but prevents the frustration of mismatched holes and a layout that looks different once actually on the wall than it did in your imagination.
The Symmetrical Grid Layout
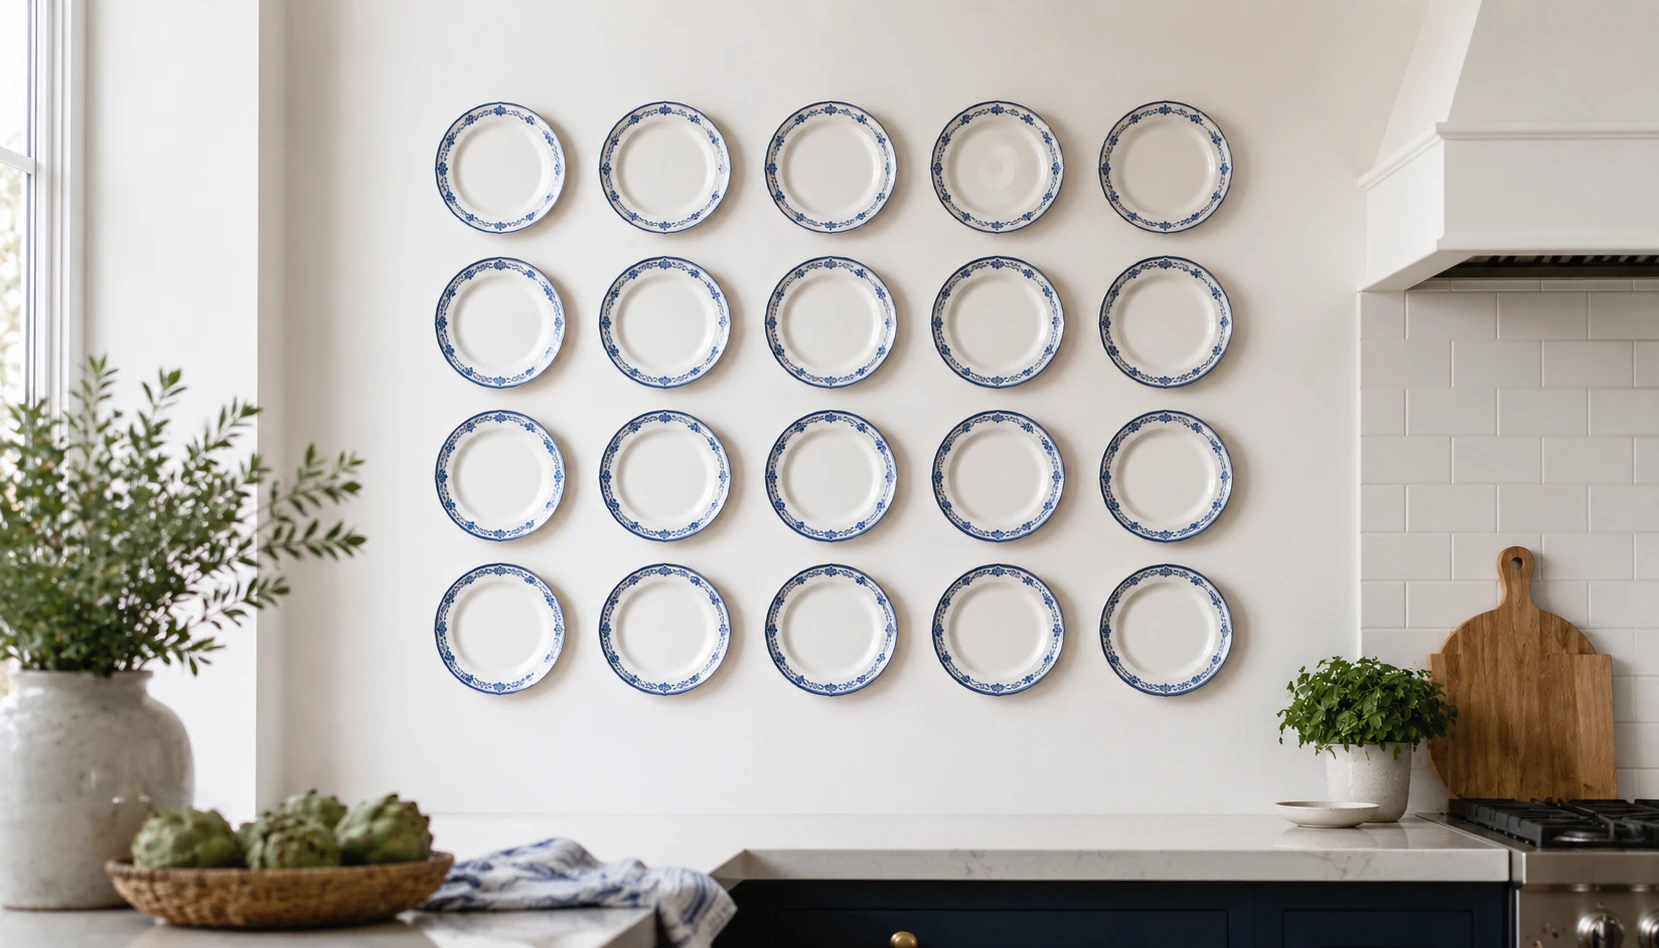
For those drawn to a cleaner, more contemporary aesthetic, the symmetrical grid layout offers structure and polish while still showcasing a beautiful plate collection.
Best suited for matching sets. This layout works most naturally when plates share the same size or a consistent, repeating pattern of sizes, creating clean rows and columns that feel intentional and orderly.
Consistent spacing is essential. Keep gaps between every plate identical, typically two to four inches, using a ruler or spacer during planning to ensure the grid reads as precise rather than approximate.
Choose rows or columns based on wall shape. A wide, short wall suits a horizontal grid of rows, while a tall, narrow space works better with a vertical column arrangement.
Alternate sizes for subtle interest. Even within a grid, alternating between two plate sizes in a checkerboard-like pattern adds visual interest while maintaining the overall clean, structured feeling.
Works beautifully in modern kitchens. This layout suits contemporary kitchens and dining rooms with clean lines and neutral color palettes, where the plates provide pattern and warmth without disrupting an otherwise minimal aesthetic.
Use a level throughout. Because precision is the entire point of this layout, a level is essential at every stage, from initial template placement to the final hanging of each plate.
The grid layout proves that plate walls are not exclusively rustic or eclectic. Done with precision, this same decorating tradition can feel entirely modern and considered.
The Free-Form Cluster Layout
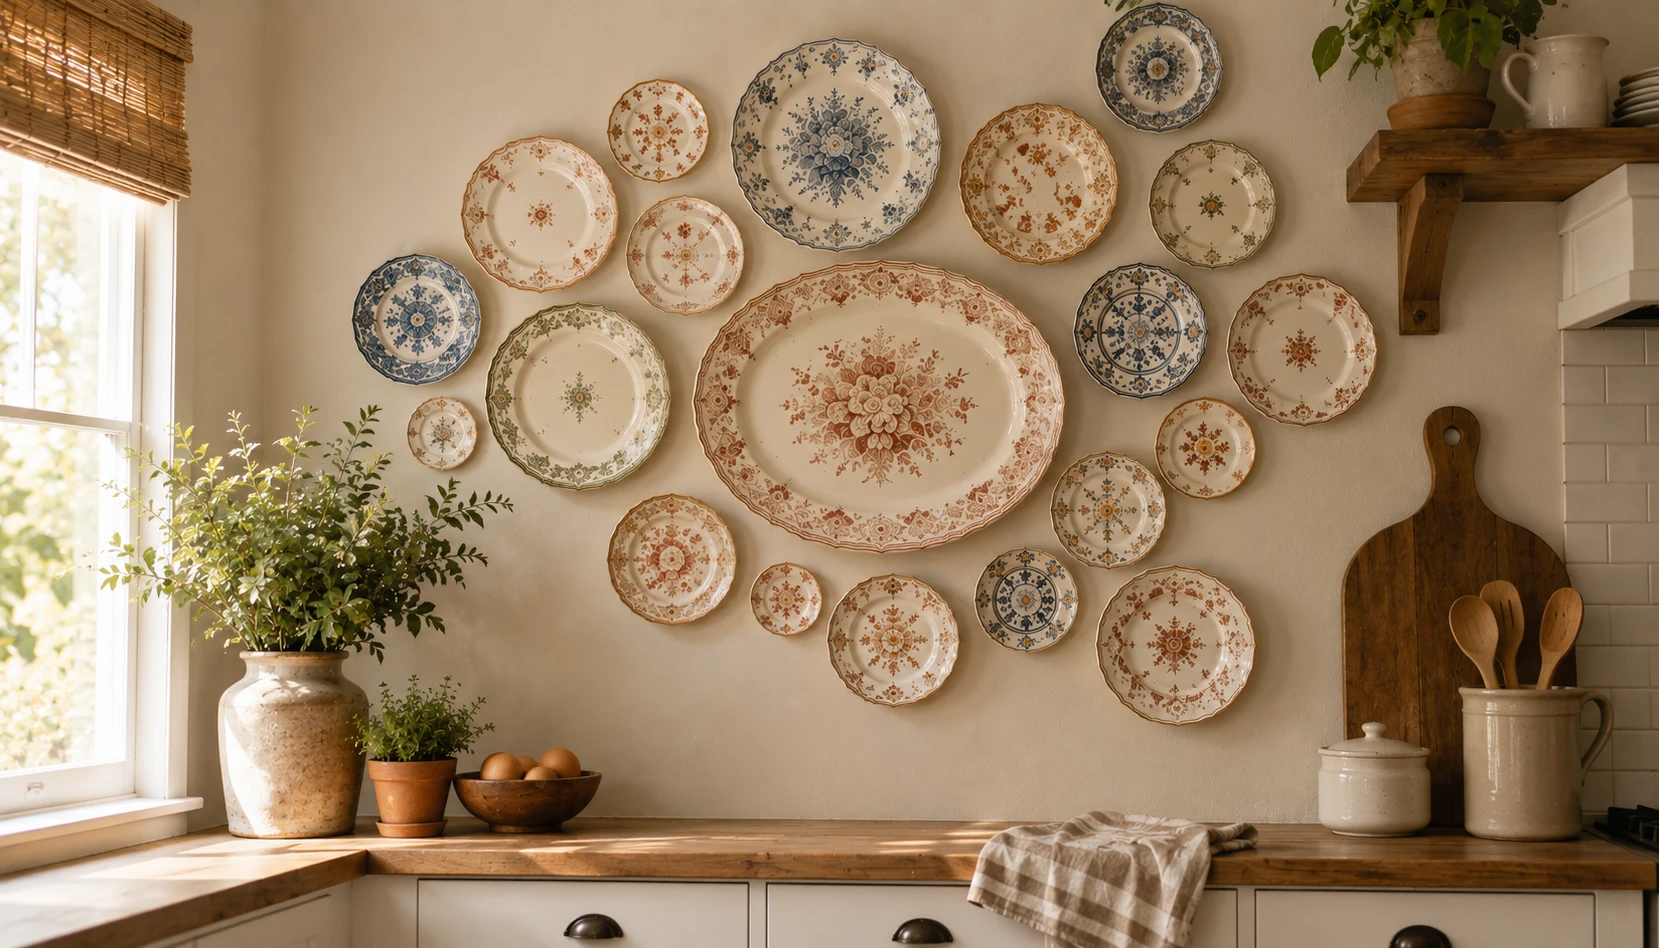
The free-form cluster is the most popular layout for plate walls, and for good reason, it embraces the natural variation of a mismatched collection rather than forcing uniformity.
Start with a focal point. Choose your largest, most decorative, or most meaningful plate as the anchor and position it roughly at the center of your intended display area, building the rest of the arrangement outward from this piece.
Build organically outward. Add plates radiating from the center point, allowing the outer edge of the cluster to feel slightly irregular and cascading rather than following a strict boundary or shape.
Vary spacing intentionally. Unlike the grid layout, spacing here should feel natural rather than mathematically precise, tighter in some areas, slightly more open in others, mimicking how a genuine collection accumulates over time.
Mix shapes for interest. Round dinner plates paired with oval platters, scalloped edges, and smaller circular saucers create the visual variety that makes a cluster feel rich and layered rather than repetitive.
Trust the process of adjustment. Free-form layouts often benefit from live adjustment even after initial planning, stepping back frequently and shifting a plate or two until the balance feels right to your eye.
Ideal for farmhouse and eclectic styles. This layout pairs beautifully with farmhouse, cottage, and maximalist interior styles where a sense of gathered, collected history is the entire aesthetic goal.
The free-form cluster is forgiving, personal, and endlessly customizable. That’s probably why it remains the most popular plate wall style among both beginners and experienced collectors.
Hanging Hardware Options
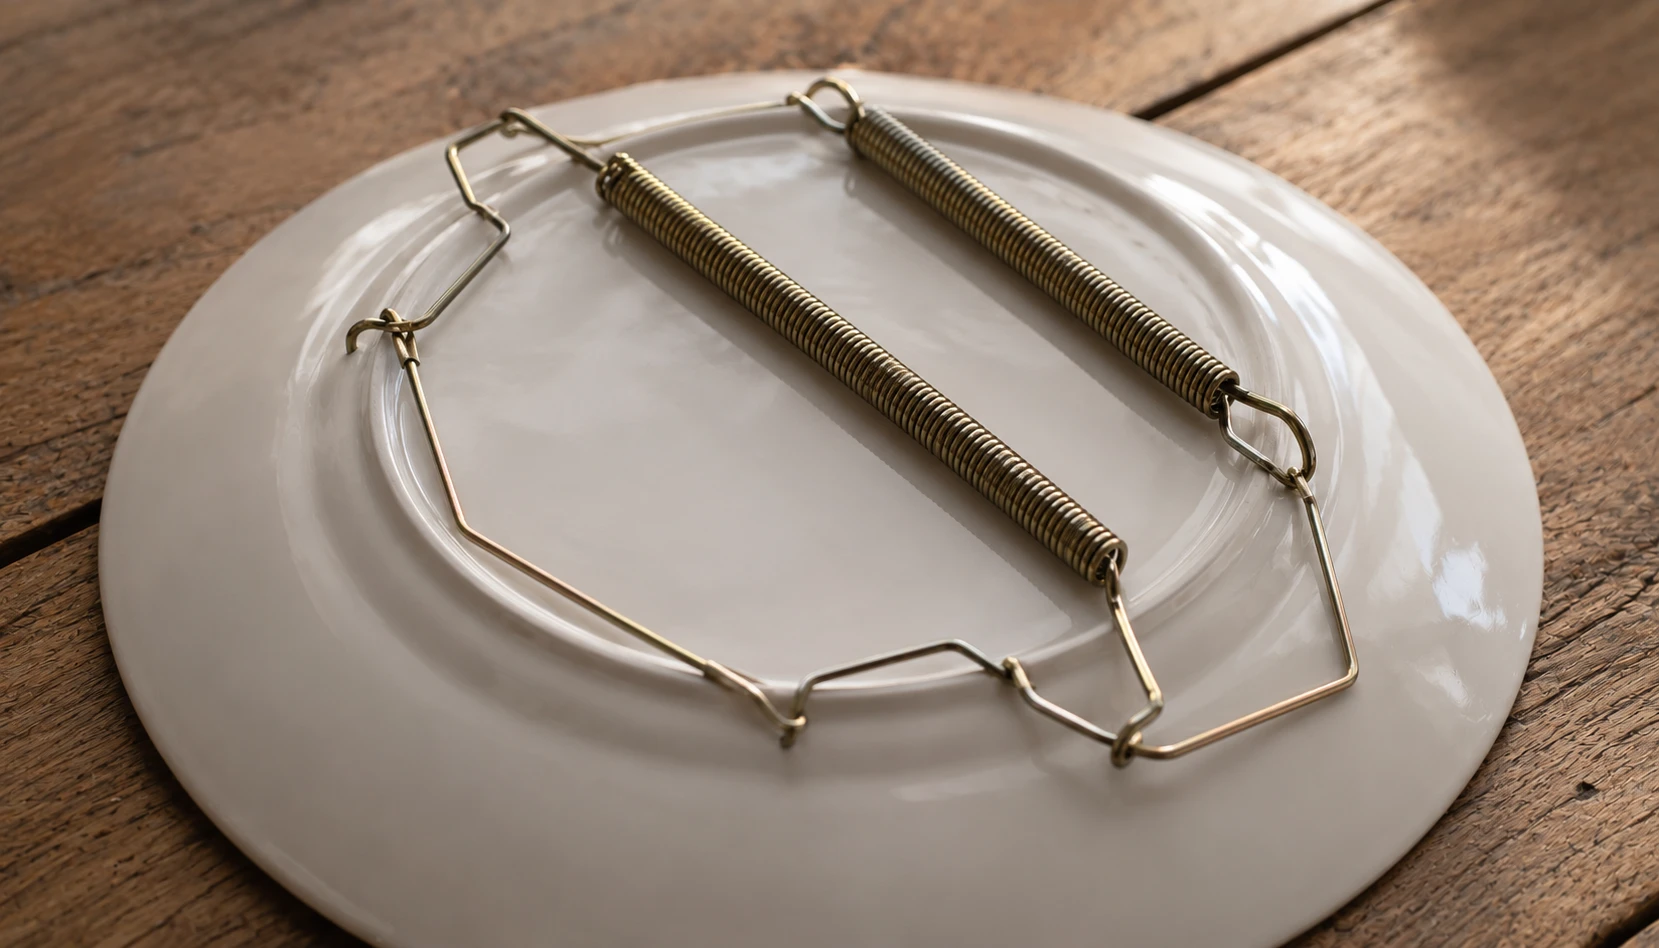
Selecting the correct hardware is what keeps a beautiful plate wall safely on the wall for years rather than becoming a cautionary tale. There are three main options, each suited to different situations.
Metal spring plate hangers. These adjustable wire hangers grip a plate’s rim with spring tension and are the most traditional, widely available option. They work well for plates with a slightly raised back rim but leave the hanger visible around the plate’s edge unless it is turned inward.
Adhesive disc hangers. These flat discs adhere directly to the back of a plate with strong adhesive, allowing the plate to sit completely flat against the wall with the hardware entirely hidden. They are ideal for plates with smooth, flat backs, though they can be difficult to remove afterward without soaking, and are not always suitable for plates with raised patterns on the reverse.
Wall-mounted plate racks and shelves. For a more flexible, non-permanent option, narrow shelves or plate rack ledges let you lean plates against the wall rather than mounting them individually, making rearranging effortless and completely eliminating the risk of damage to the plates themselves.
Matching hardware to weight. Lightweight decorative plates under roughly six pounds work well with adhesive hangers or lightweight spring hangers, while heavier platters need robust metal hangers paired with proper wall anchors rated for the additional weight.
A small dab of security. Regardless of hanger type, a small amount of museum putty or adhesive gel at the bottom edge of the plate adds extra security against slipping or rattling, particularly valuable in homes with foot traffic or households with pets.
Consider your wall type. Drywall requires proper anchors rated for the combined weight of plate and hanger, while plaster or brick walls need different anchor types entirely, always match your anchor choice to your specific wall construction.
Taking the time to choose appropriate hardware for each individual plate, rather than using one hanger type for everything, is what separates a plate wall that lasts for decades from one that becomes a stressful repair project.
Step by Step Hanging Method
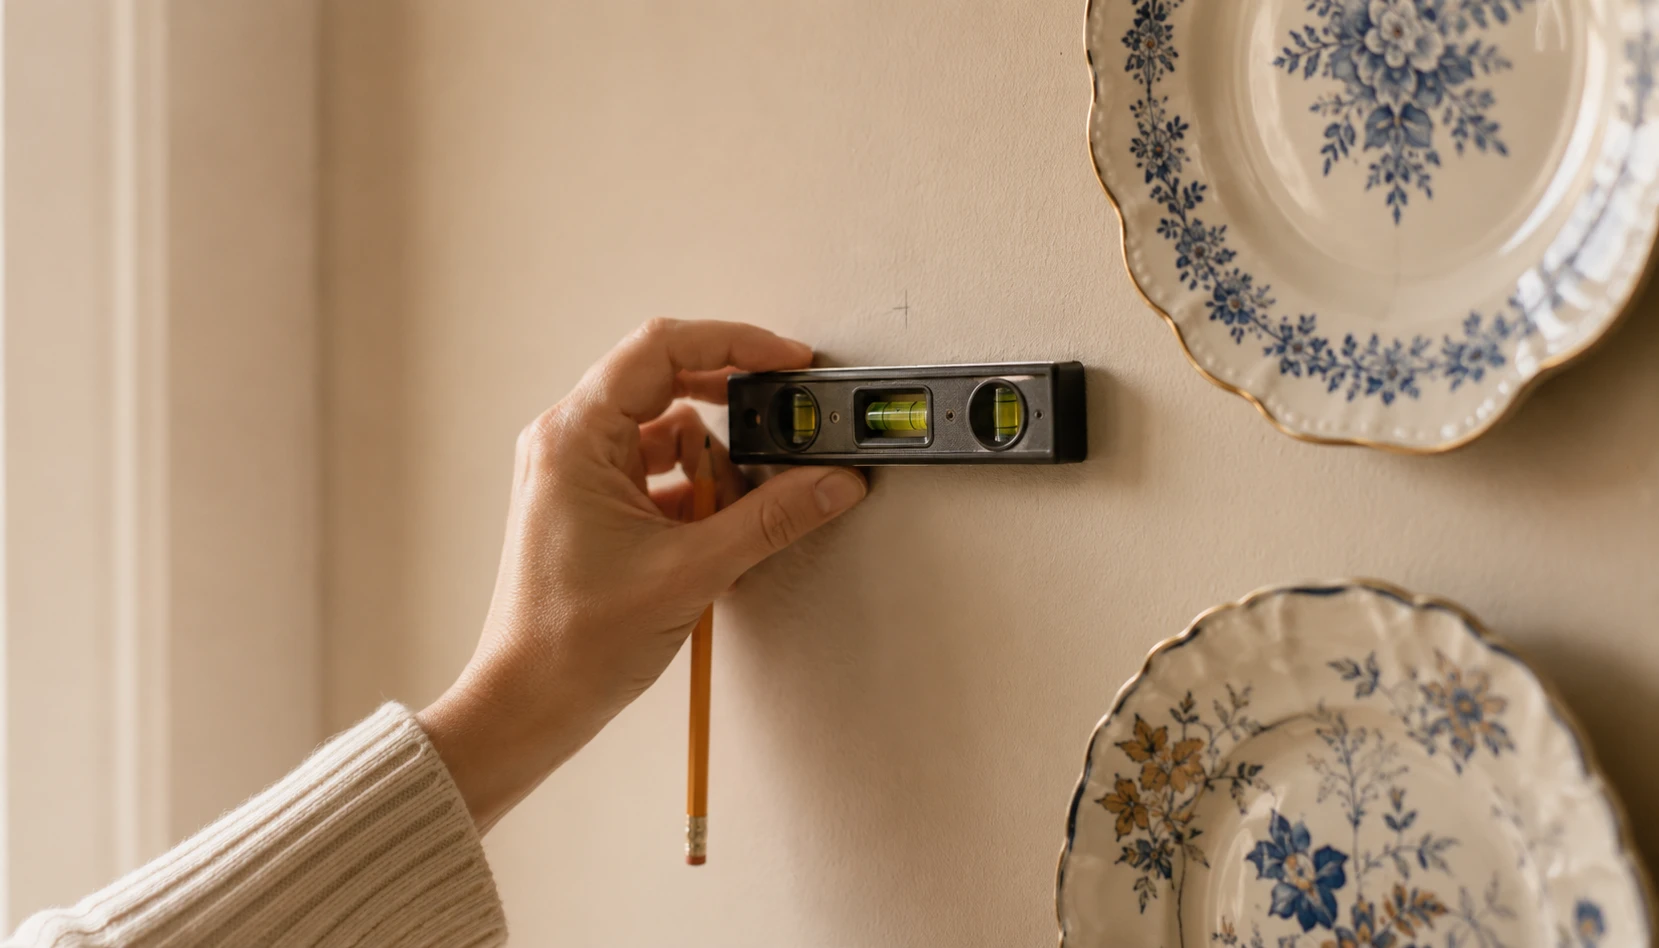
With plates chosen, layout planned, and hardware selected, the actual hanging process is straightforward when followed methodically.
Step one, attach hangers first. Before touching the wall, attach the appropriate hanger to the back of every plate in your arrangement, ensuring each one is securely fitted and centered.
Step two, hang the focal point first. Whether working with a grid or free-form layout, begin with your central or largest plate, using your marked pencil point and a level to ensure it sits perfectly straight.
Step three, work outward methodically. Continue hanging plates outward from this anchor point, following your paper template markings, checking level and spacing after every two or three additions rather than waiting until the end.
Step four, step back frequently. Every few plates, step back several feet and view the arrangement as a whole. What looks correct up close can appear uneven from across the room, catching these issues early prevents having to redo work later.
Step five, make final adjustments. Once all plates are hung, do a final walk-around from multiple angles and distances, making any small adjustments to spacing or alignment while pieces are still easy to shift.
Step six, secure and finish. Add any final museum putty or adhesive security dabs, dust each plate’s surface, and consider adding subtle accent lighting if the wall would benefit from evening illumination.
Following this sequence, rather than hanging plates in a rush, keeps the finished result close to the vision you planned for.
Plate Walls by Room
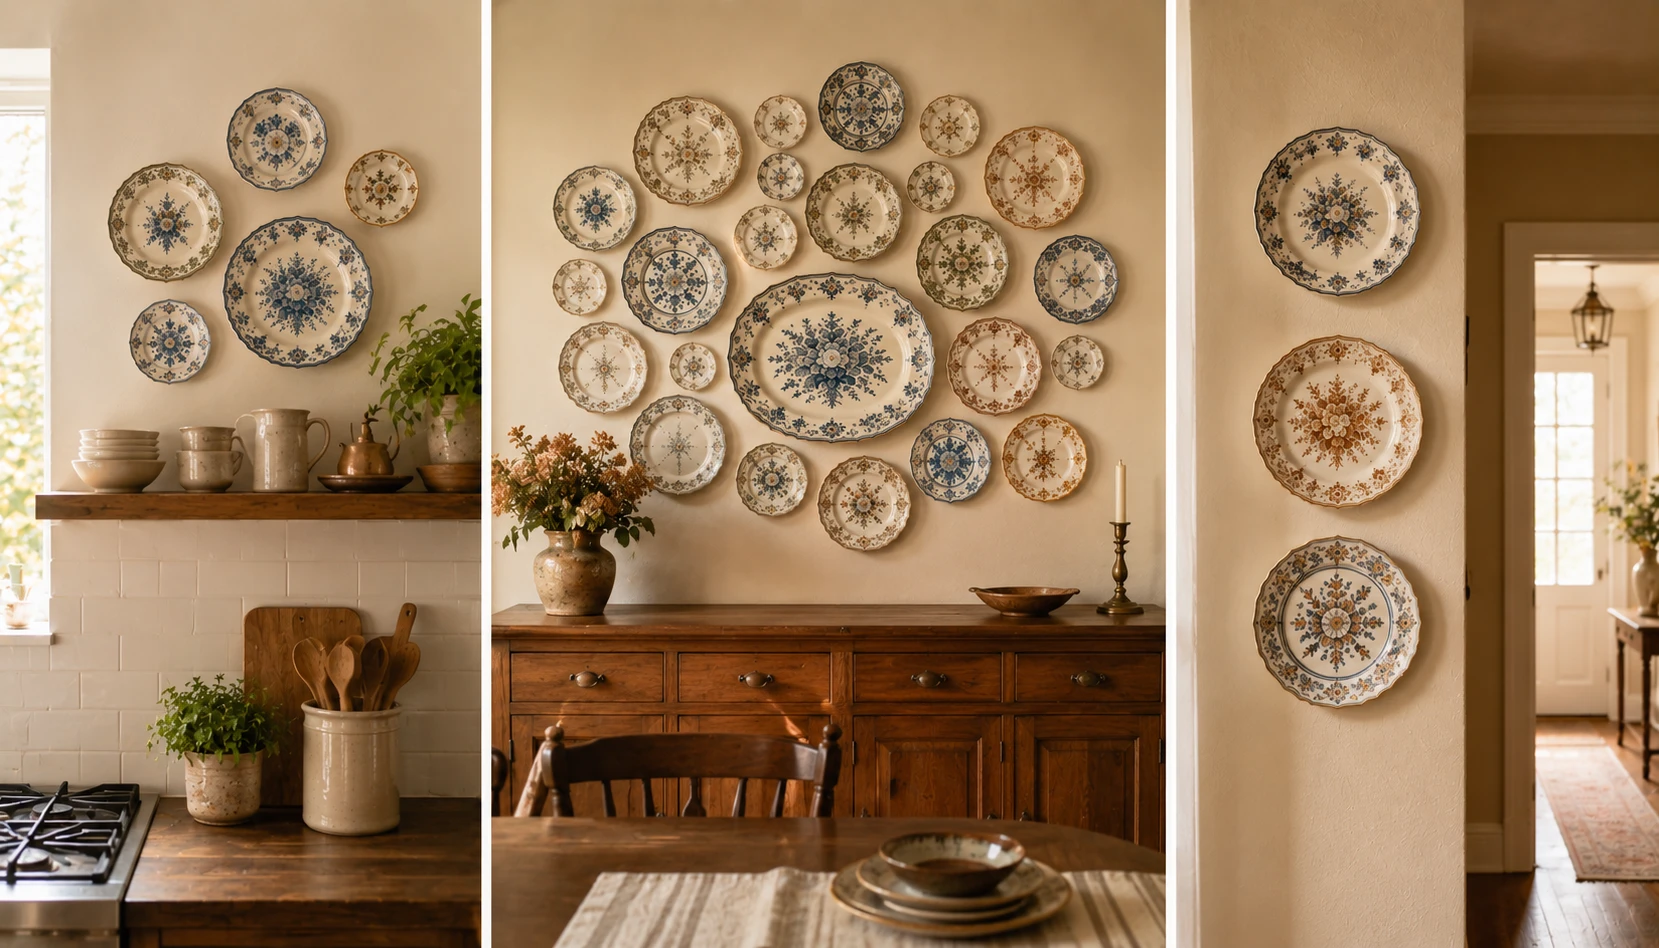
While plate walls are traditionally associated with dining rooms, this decorating style translates beautifully across nearly every room in a home.
Kitchen. A plate wall above a stretch of counter or beside open shelving reinforces a collected, lived-in kitchen aesthetic, particularly effective in farmhouse and cottage-style spaces. Smaller clusters near a breakfast nook also work beautifully. For more small kitchen styling ideas, see our guide to small kitchen ideas.
Dining room. The classic setting for plate walls, dining rooms suit larger, fuller clusters that can serve as the room’s primary art statement, often centered above a sideboard or buffet.
Hallway. A narrow, elongated cluster running along a hallway wall transforms an often-overlooked transitional space into a genuine gallery moment, ideal for smaller plates given typically tighter hallway widths.
Bedroom. An unexpected but increasingly popular placement, a soft, small cluster of delicate plates above a bed or dresser adds warmth and personality without the visual weight of larger framed art. For a full bedroom color story to pair with a delicate plate cluster, see our sage green bedroom ideas.
Entryway. A modest arrangement near the front door creates a memorable first impression and works particularly well with plates that hold personal or sentimental meaning, setting a warm tone as guests enter.
Bathroom. For smaller powder rooms, a compact cluster of two or three decorative plates adds unexpected charm to a space that often lacks meaningful wall decor options.
Matching the scale and density of your plate wall to the specific room, fuller and larger in main gathering spaces, more restrained in intimate spaces, ensures the display feels proportional rather than overwhelming or underwhelming.
Mixing Colors and Patterns
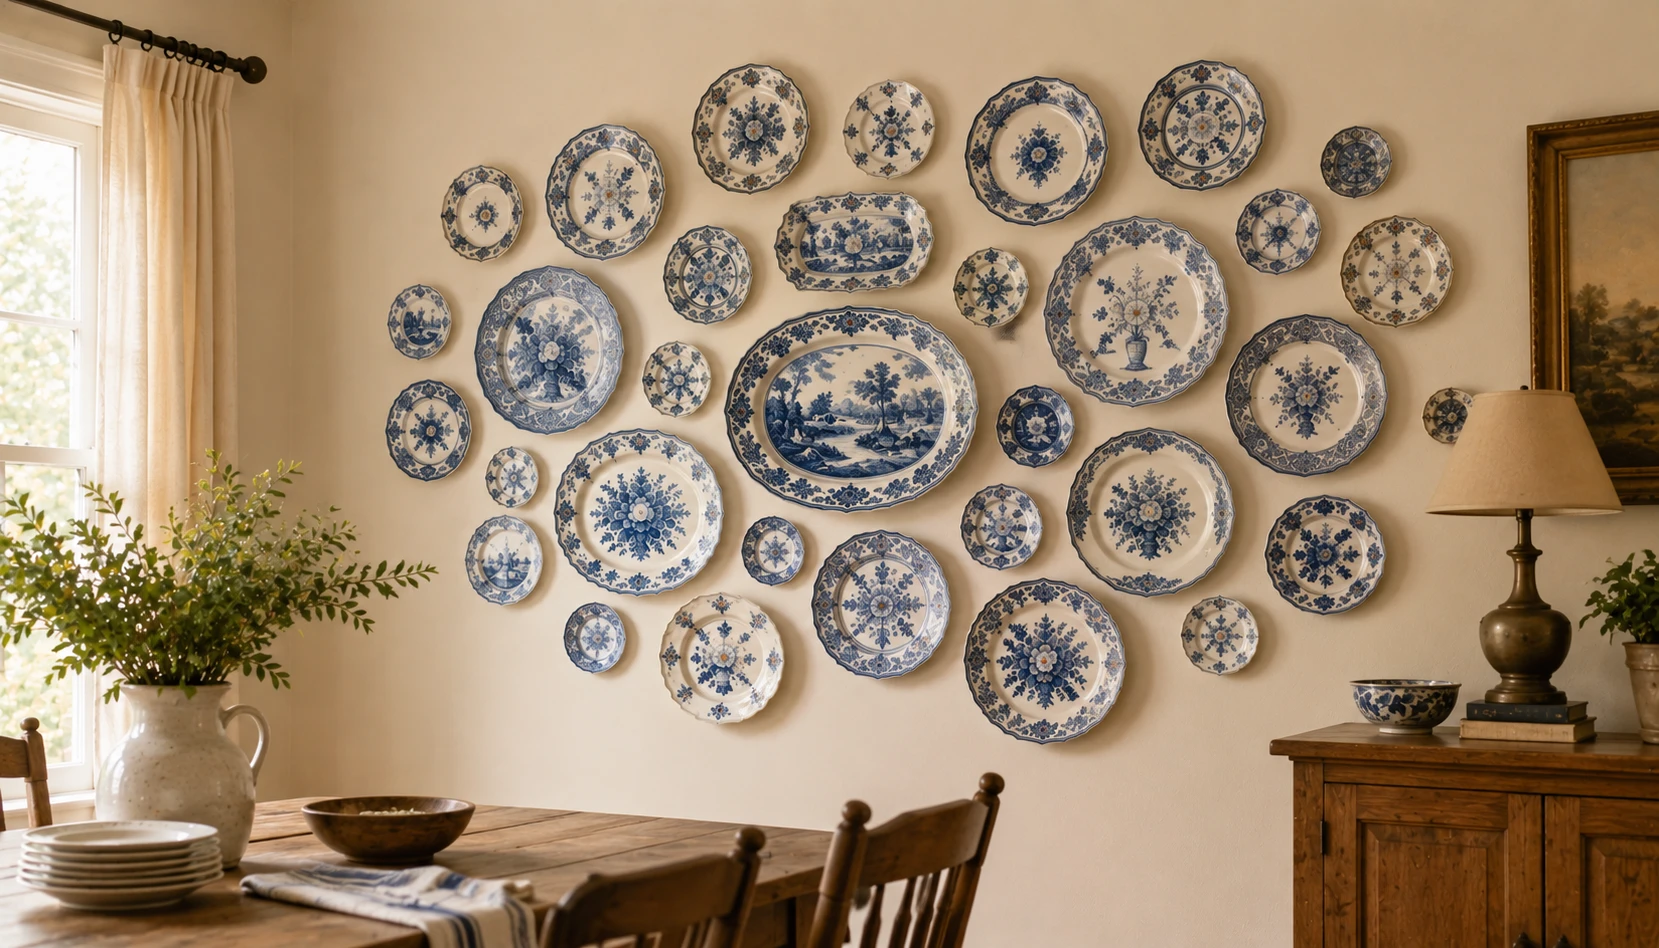
Color is often what determines whether a mismatched plate collection reads as curated or chaotic. A thoughtful color strategy ties even wildly different patterns into a cohesive whole.
The monochromatic approach. Choosing plates that share a single dominant color, all blue and white, all soft pastels, or all warm terracotta tones, creates immediate visual cohesion regardless of how different the individual patterns are.
Neutral base with pattern accents. A foundation of plain white or cream plates interspersed with a smaller number of heavily patterned pieces lets the patterns feel like intentional highlights rather than overwhelming the eye.
Repeating a single accent color. If your plates vary widely in style, look for even a small shared accent color, a gold rim, a particular shade of green, across each piece to create a subtle unifying thread.
Energizing a neutral room. In a room with predominantly neutral walls and furniture, a plate wall becomes an opportunity to introduce meaningful color and pattern without committing to paint or wallpaper.
Telling a story through palette. Rather than choosing colors purely for visual matching, consider selecting plates whose colors reflect a personal narrative, pieces from a particular country, a specific decade, or a beloved family tradition.
Testing before committing. During the paper template planning stage, it can help to note each plate’s dominant color directly on its template, making it easier to spot color balance issues before anything is permanently hung.
The strongest plate walls use color not as decoration for its own sake, but as the thread that turns a genuinely personal, varied collection into something that reads as intentional design.
Small Space Plate Walls
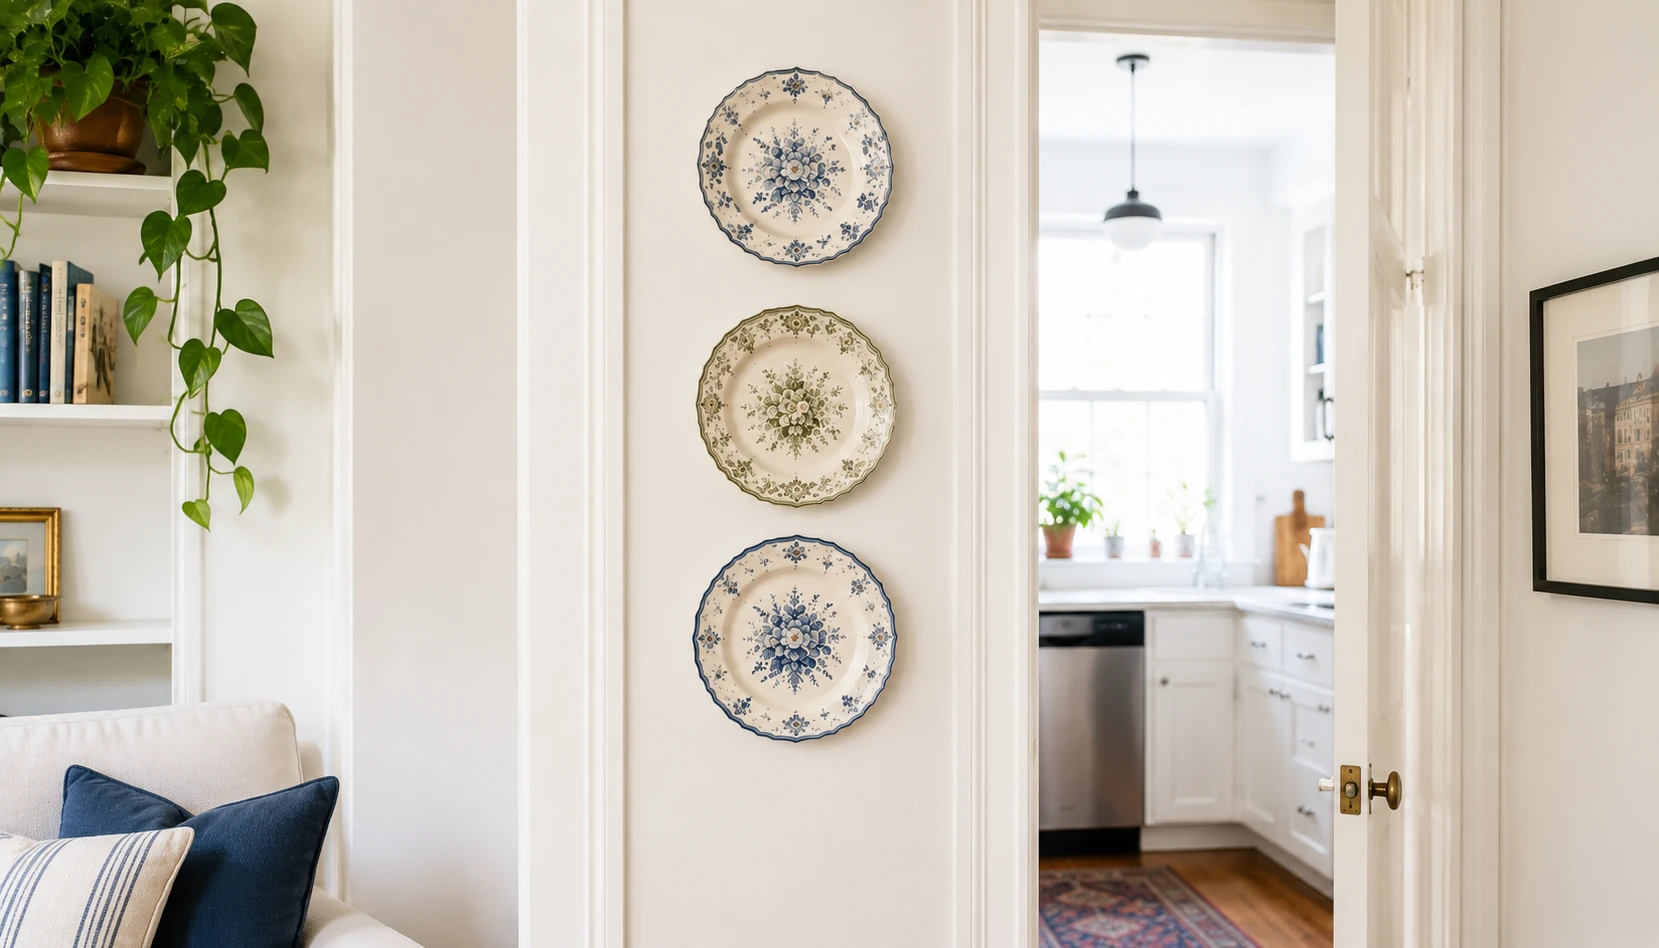
Plate walls are not reserved for large dining rooms. In small apartments and compact rooms, a scaled-down approach creates just as much impact without overwhelming the space.
Less is genuinely more. In compact kitchens, bedrooms, and hallways, a cluster of three to five plates creates a considered accent, while attempting a large, dense arrangement in a small room can feel cramped rather than curated.
Prioritize negative space. Leaving generous breathing room around a small cluster, rather than packing plates tightly together, makes the display feel intentional and gives each individual piece room to be appreciated.
Choose one focal size. In tighter spaces, working with plates closer to a similar size, rather than mixing dramatically large platters with tiny saucers, keeps the display feeling organized within limited wall real estate.
Vertical arrangements suit narrow walls. A single column of three or four plates works beautifully beside a doorway or in a narrow hallway where horizontal space is limited but vertical space is available.
Non-permanent options for renters. Adhesive strips rated for lighter plates, or a small leaning shelf ledge, allow small space dwellers and renters to enjoy this decorating style without any lasting wall damage.
Let plates do double duty. In very small spaces, consider plates that could also serve a small function nearby, a shelf edge that holds both displayed plates and a few books, maximizing the value of limited wall space.
A restrained, well-edited small plate cluster often reads as more sophisticated than an overly ambitious large arrangement squeezed into insufficient space.
Budget and Thrifting Tips
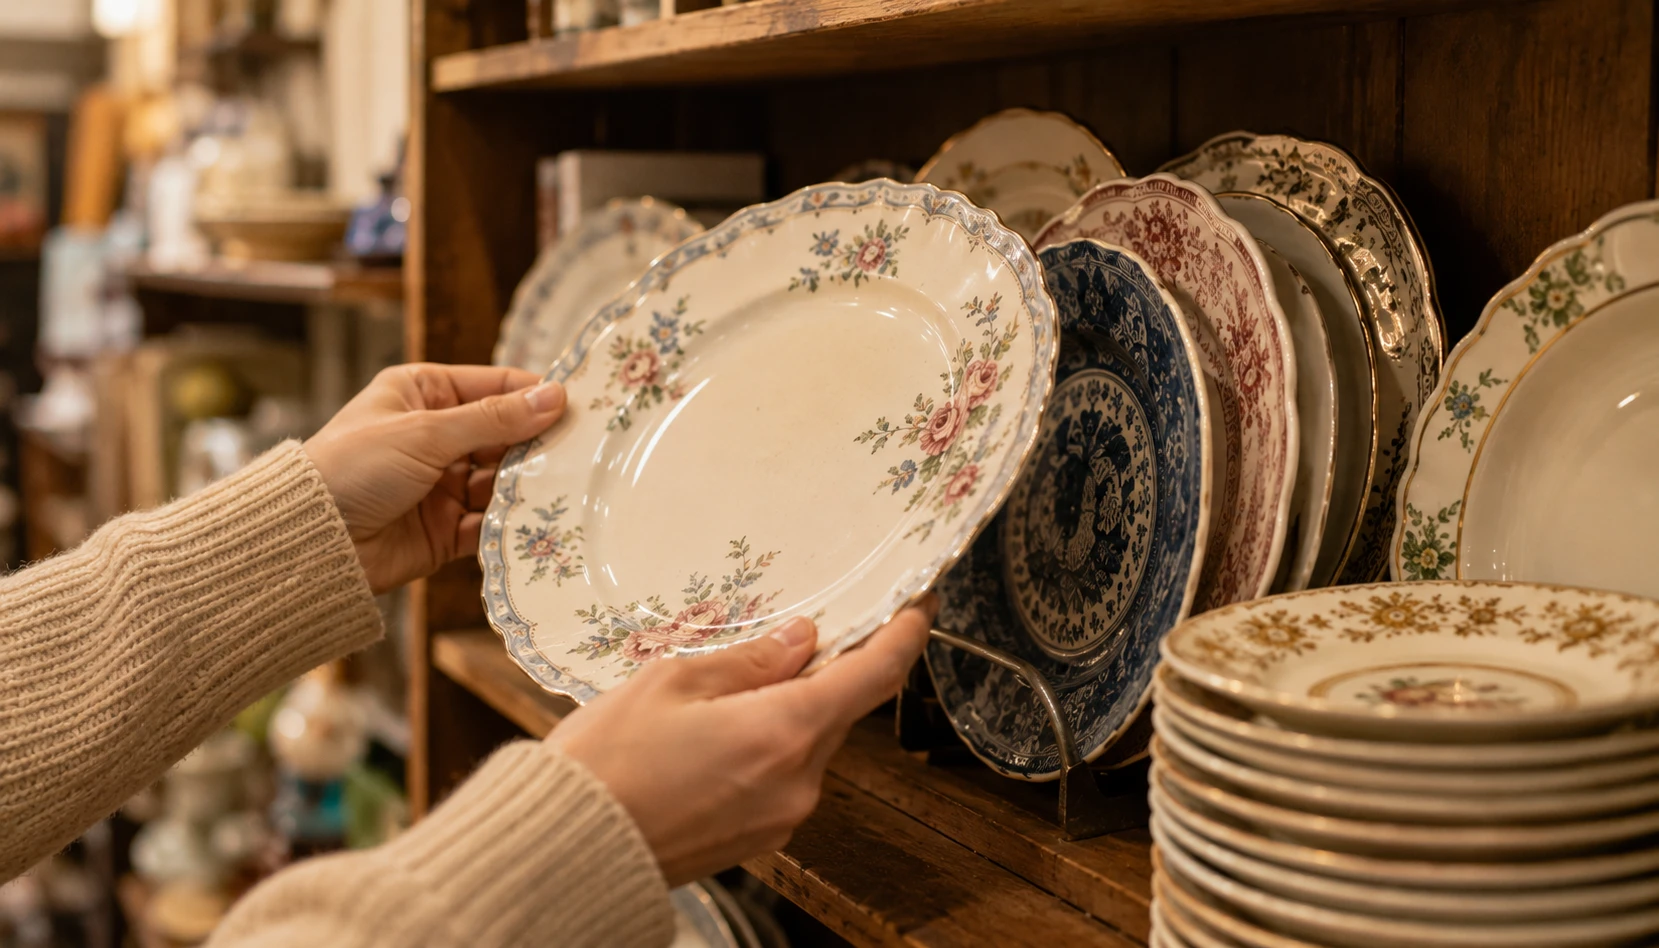
One of the most appealing aspects of plate wall decor is how affordable it can be, often costing only a fraction of comparable framed art or wall decor.
Thrift stores are the best starting point. Secondhand shops consistently offer the widest and most affordable selection of decorative plates, often just a few dollars each, with new inventory arriving constantly.
Estate sales yield the best finds. Estate sales frequently include entire sets of vintage china at a fraction of their original value, and sellers are often willing to negotiate on partial sets or single pieces.
Check your own cabinets first. Many households already own decorative plates, wedding gifts, inherited pieces, souvenirs, sitting unused in storage that could become the foundation of a display at zero additional cost.
Flea markets offer character pieces. Flea markets tend to have more unique, one-of-a-kind pieces compared to thrift stores, ideal for adding standout focal plates to an otherwise more uniform collection.
Buy incrementally. There is no requirement to complete an entire plate wall at once. Starting with three or four plates and adding new finds over months or years is both more budget-friendly and creates a genuinely evolving collection.
Hardware costs stay minimal too. Basic metal spring plate hangers cost only a few dollars each, and adhesive disc hangers are similarly inexpensive, meaning the hanging hardware itself rarely represents a significant expense.
A genuinely beautiful, full plate wall can often be built for less than the cost of a single piece of framed art, making this one of the most budget-friendly ways to add real character to a room.
Common Plate Wall Mistakes
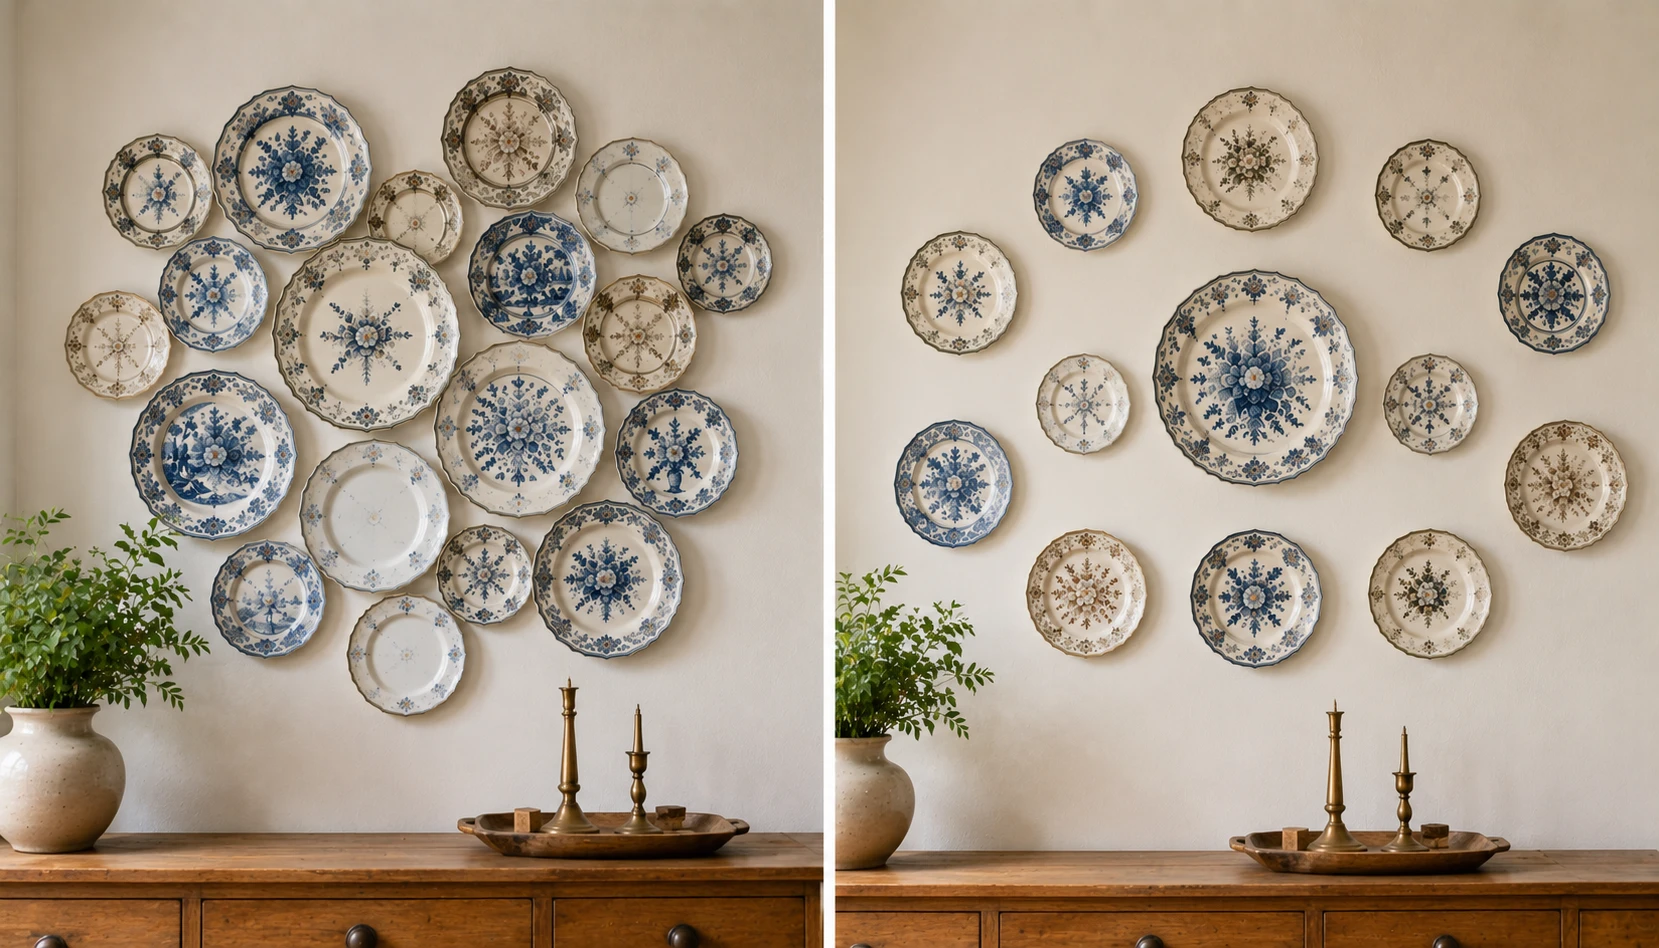
Even a forgiving, organic project like a plate wall has pitfalls worth avoiding for the best possible result.
Mistake 1: Skipping the planning stage. Hanging plates directly onto the wall without first testing the layout on the floor and with paper templates is the leading cause of unsatisfying, cramped, or lopsided final arrangements.
Mistake 2: Using the wrong hanger for the plate’s weight. Underestimating a heavy platter’s weight and using inadequate hardware risks both damage to the plate and the wall. Always match hanger strength to actual plate weight.
Mistake 3: Inconsistent spacing in a grid layout. For symmetrical arrangements specifically, uneven gaps between plates undermine the clean, precise look that makes this layout appealing in the first place.
Mistake 4: Too many competing patterns without a unifying thread. A collection with no shared color, era, or style can read as chaotic rather than curated. Always identify some common thread before finalizing a mismatched collection.
Mistake 5: Overcrowding a small wall. Attempting to fit too many plates into limited wall space eliminates the breathing room that makes a display feel intentional rather than cluttered.
Mistake 6: Ignoring the eye-level rule. Hanging an entire arrangement too high or too low relative to typical eye level, roughly fifty-seven to sixty inches for the center point, makes the display feel disconnected from the room.
Mistake 7: Forgetting to check from a distance. Only evaluating the arrangement up close during installation, rather than stepping back periodically, can result in a layout that looks fine plate by plate but unbalanced as a whole.
Mistake 8: Using permanent methods on rented walls. Renters should confirm adhesive hanger removal processes and avoid heavy-duty wall anchors that could cause damage difficult to repair before moving out.
A decorative plate wall offers something increasingly rare in home decor: a genuinely personal display built from objects with real history and meaning, at a cost most other wall art simply cannot match. Whether assembled from a lifetime of collecting or built deliberately over a single thoughtful weekend, the result is a wall that tells your story rather than simply filling empty space.
Start with the plates you already have, or take a first trip to a local thrift store with fresh eyes for pattern and color. Lay everything out, experiment with paper templates, and let the arrangement come together gradually. The best plate walls are rarely finished quickly, they grow richer with every new piece added over time.
For more handmade and budget-friendly decorating ideas see our guides on Air Dry Clay Home Decor and DIY Home Decor Under Twenty Dollars, which pair beautifully alongside a growing plate wall collection.